The Evolution of the Honey Badger
Awhile back….I’m talking a few years ago now, I was on one of my good friend Heath’s boats while we were out fooling around for a day on the water. We were traveling at a high rate of speed in very shallow water, something this boat we were on is very good at, when I pointed out that we were about to hit a oyster bank that was protruding out of the water.
Heath just smiled, told me to “Hold onto something!” and pushed the throttle down further. We hit the fast approaching oyster bed, caught a few feet of air while the motors tachometer red-lined with the prop out of the water till we landed with a big splash safely back in the water and continued on our way.
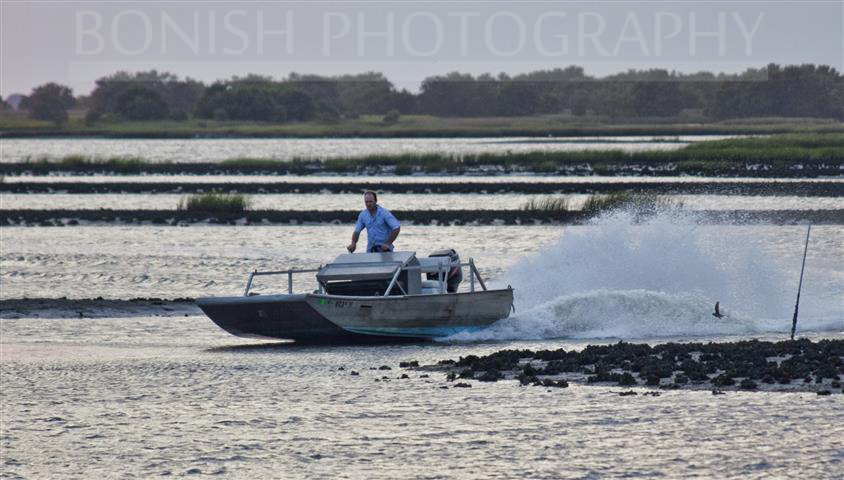 We both laughed and Heath said “This boats, a Honey Badger….It Doesn’t Give a Shit what you put it through!”
That was the day the ‘Aluminum Boat‘, as it was refereed to previously, was christened with the ‘Honey Badger‘ name.
The Beginnings
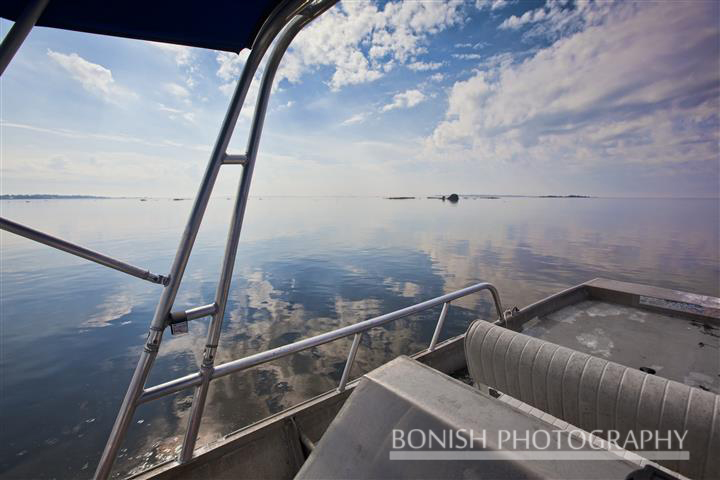
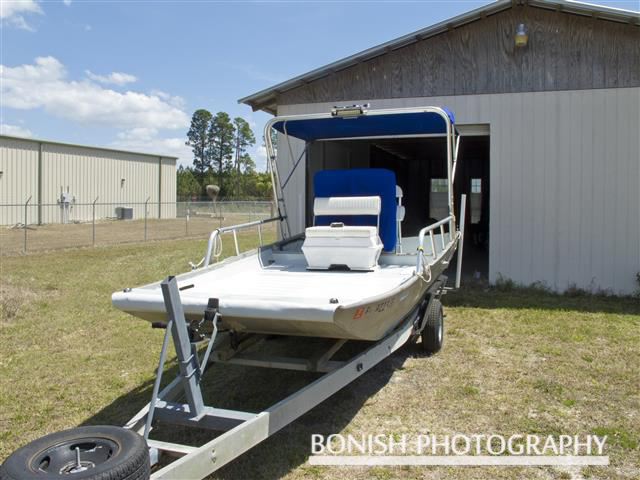
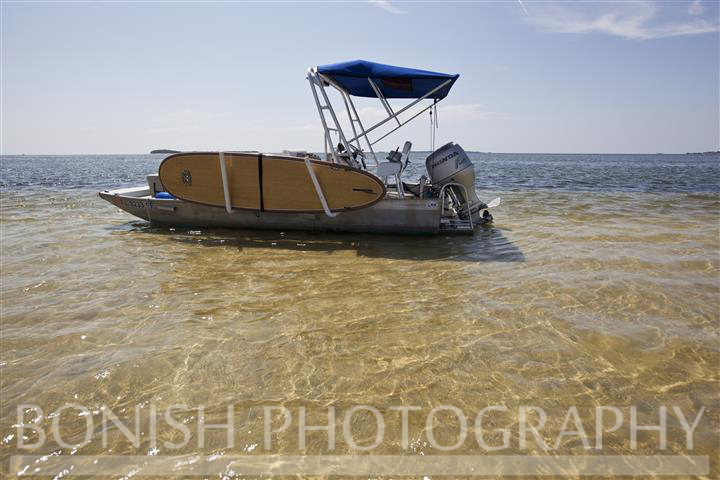
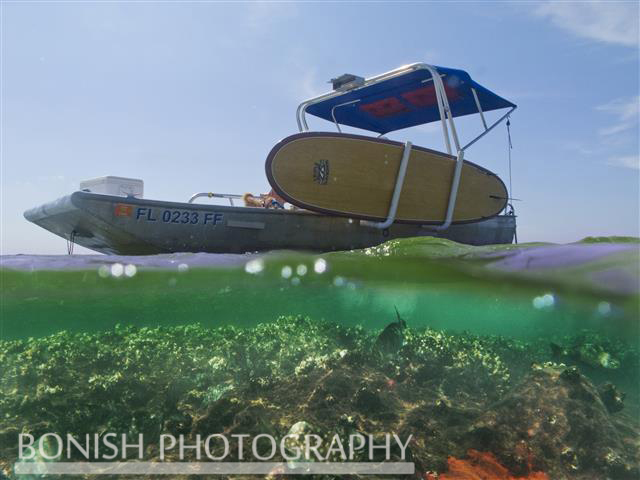
This boat started its life as an aluminum hulled Airboat. When that owner was done with his airboat, he stripped it down, parted it out and sold the aluminum hull by its lonesome. Heath and his dad bought the hull and brought it to a local welder where they had it decked over, put in a center console and had the fabricator create a Tunnel underneath so it would be able to run in very shallow water.
For those that don’t know what a tunnel is, it basically extends the bottom of the boat on its outer edges so where the outboard motor sits in the middle, it could be sitting on solid ground and the prop is sitting safely in the spot the tunnel creates. This means when the boat is moving and up on plane, you can run in about 8″ of water. We’ve gotten ourselves into areas where most think you simply cant go, and as long as you have enough room to get yourself back up and onto plane, you can get yourself back out.
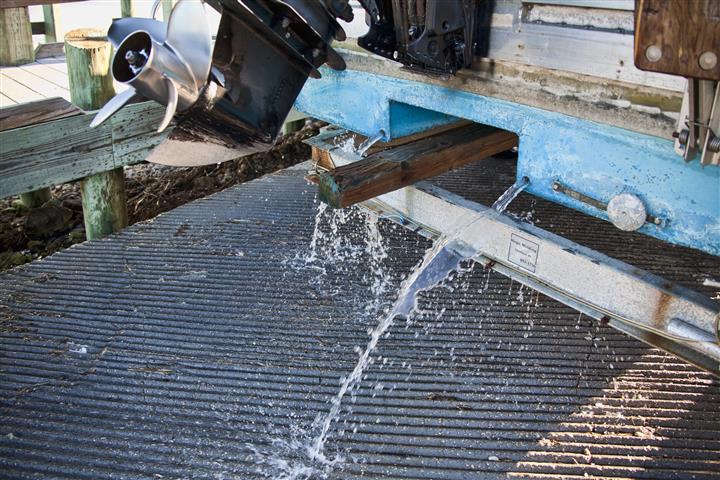
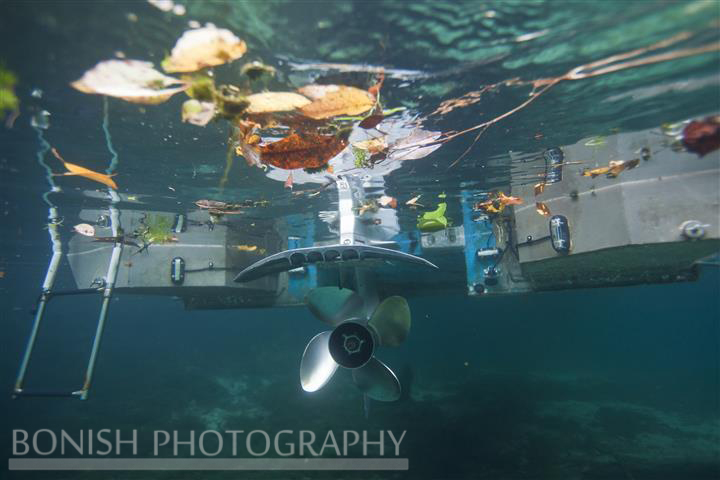
Silly photo, but it shows the Tunnel Portion of the Hull
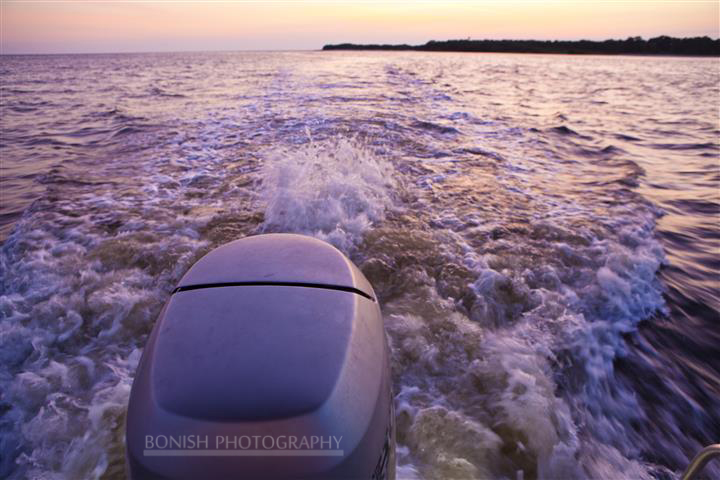
Luckily this boat has a 90hp Two-Stroke Mercury Outboard (Recently updated to a 90hp Four Stroke Honda outboard) with a Custom 4-Blade Prop, so it has plenty of power for how light it is. With a punch of the throttle, the boat can be up on plane within the 19′ length of the hull.
 This boat has also been through a lot in the short time we’ve lived here in Cedar Key. While moving the SS Minnow to its current location behind the Low-Key Hideaway, we accidentally sunk the aluminum boat while leaving it tied to a dock with a rising tide. Who would think that after an entire day spent getting it floating and onto a trailer, it had the motor stripped down, rebuilt and was running the next day.
I had told Heath that Cindy and I were thinking of getting a boat awhile back. He told me that he never really used the Aluminum Boat all that much, and suggested we tie it up out behind the motel and see if we would use it as much as we thought we would. It made sense and we agreed that if anything was to happen to the boat while it was on our watch, we’d pay to have it fixed. Better to use a boat for a trial period to see if we’d really use or want one after we had access to one full time.
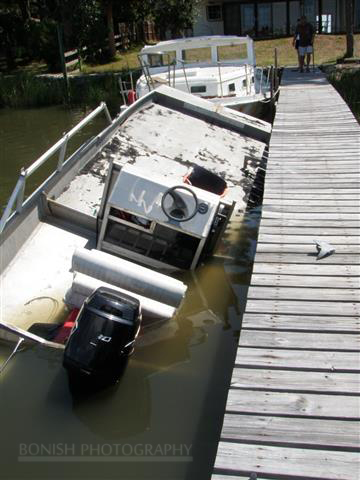
Heath had never left it in the water when he owned it. When we started using it, I wanted to leave it tied to the dock out back so we’d be able to use it when ever we had some spare time and wouldn’t have to hassle with launching it from the trailer. One day we’re getting a beer delivery to the tiki bar (They deliver real early in the morning) and the guy questions why the boat tied to the dock is almost submerged in the water?
Cindy and I go running out back to realize that the boat has to have a hole in it since it’s sinking while just sitting tied to the dock. We jump in it, and get it going up on plane. With all the water in the back of the hull, the bow of the boat was sticking straight out of the water. I’m yelling to Cindy to climb up to the bow of the boat to try and counter balance the weight as we’re hauling butt through the water. She’s screaming back at me about how much she hates my guts while climbing up on a bouncing, heaving hull. Oh, this was also around December, so it was really cold out that day.
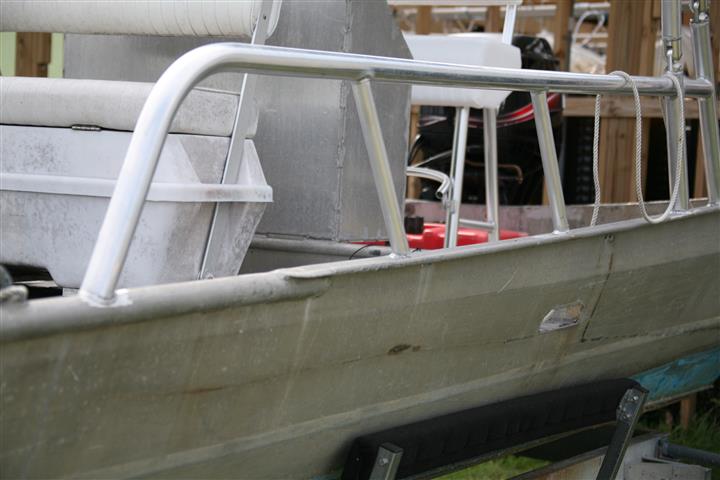
That was the small pin-hole that was allowing water into the hull
During all this ruckus, I called Heath and asked him to bring the trailer to the boat ramp as we’d meet him there in a few minutes. When we pulled the boat up on the trailer, we found a tiny pin hole in the hull that had been allowing the water to get inside the hull.
I ended up patching it with some two part epoxy and it’s never leaked since. For added insurance, we also had bilge pumps installed in each tunnel just to be on the safe side in case we ever punch a hole in the hull while on the water or in case that epoxy fails.
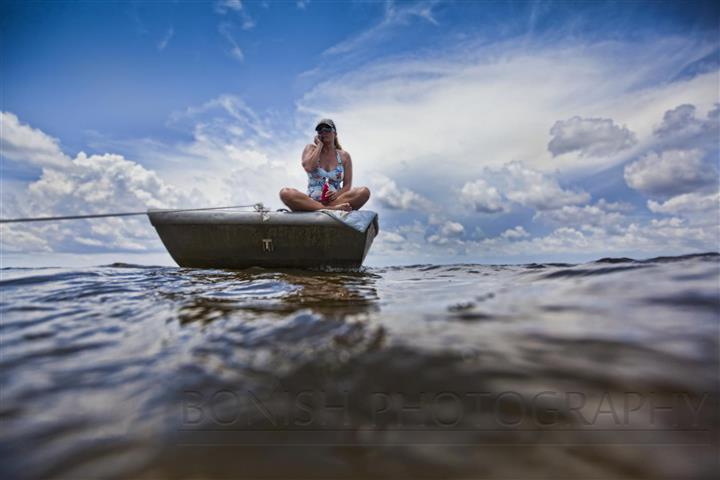
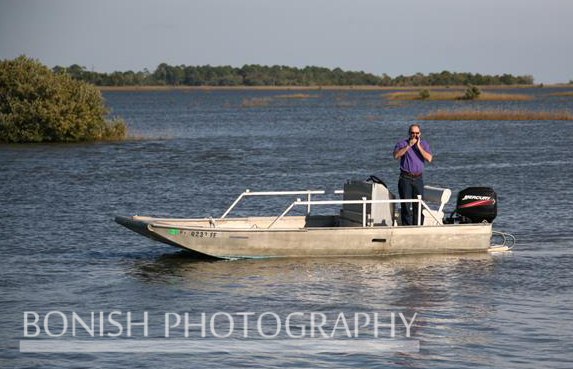
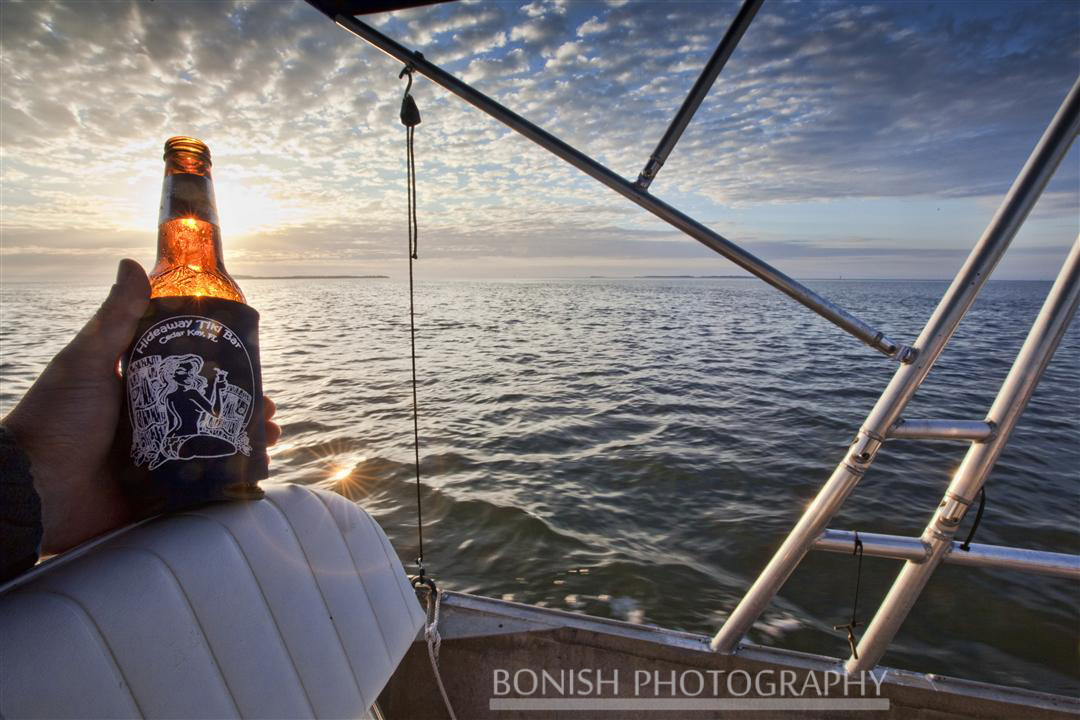
Cindy’s Floating Office in Cedar Key
After months of using it on a weekly basis and loving every second of it, it came time to either move up to our own boat, or start adding creature comforts to this Work Boat. Remember that this boat was strictly built to get them out to the clam leases when the tide was low and a regular boat wouldn’t be able to run in such shallow water. Cindy and I both loved the capabilities of this boat for photography around Cedar Key, but wanted a bimini, a radio to listen to some tunes and more comfortable seating along with a host of personal touches added to make it more user friendly.
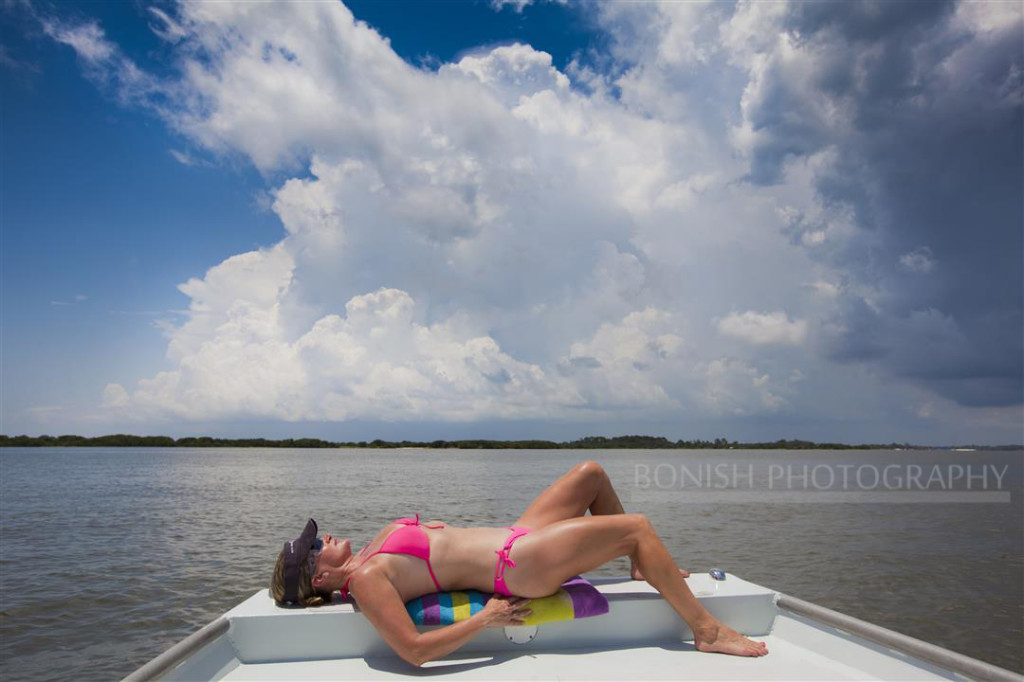
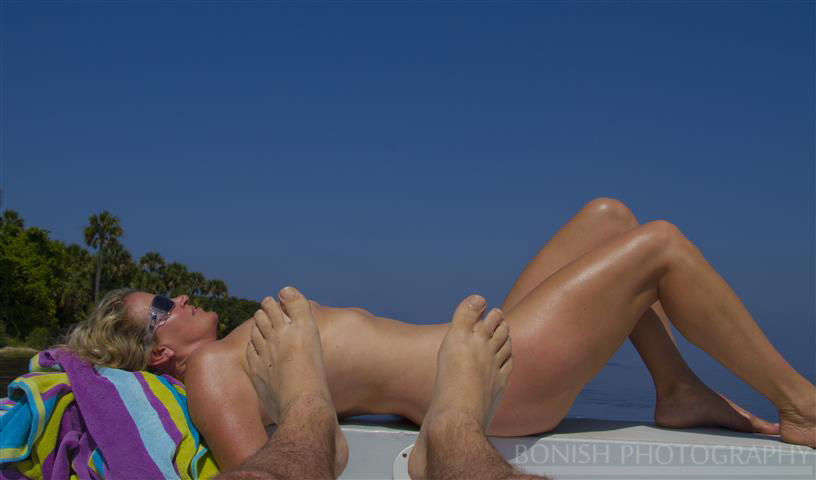
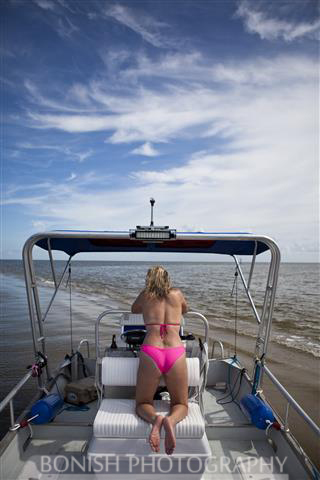
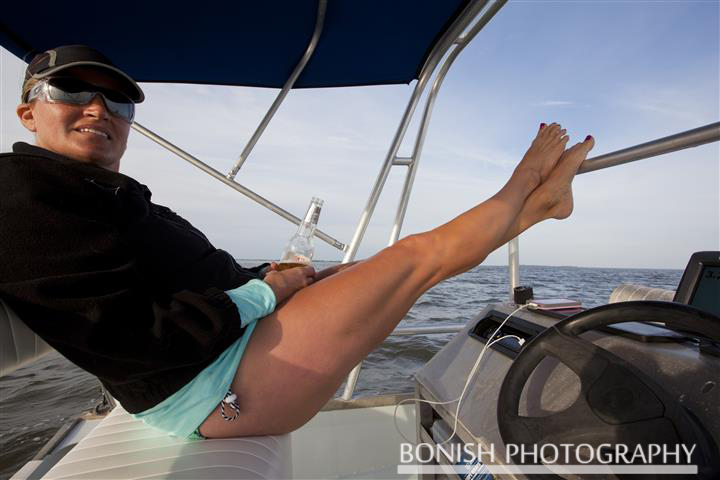
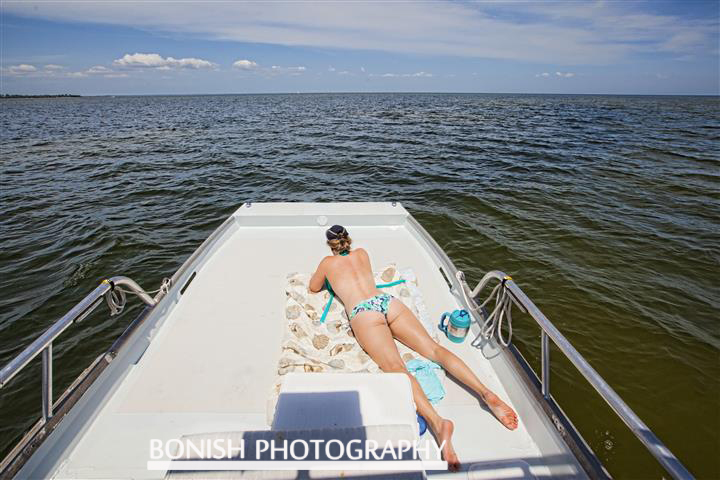
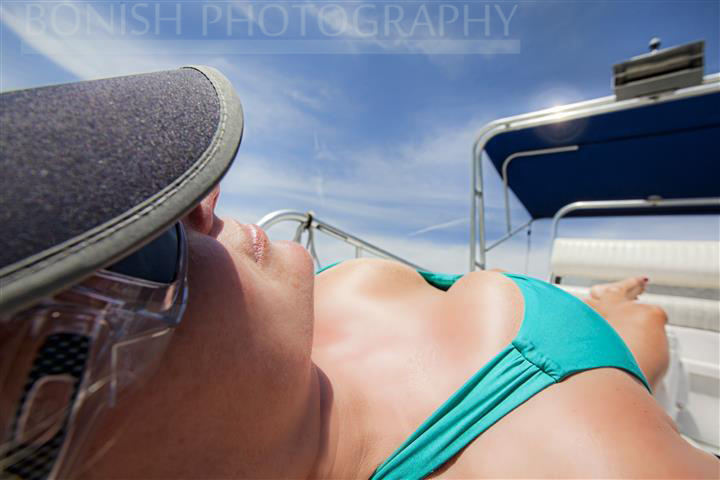
Cindy laying out on the boat with Luca
Spending the day out on the water without any shade is just grueling for someone like me who cant really stand to be out in the sun. I like to listen to music while on the water and Cindy likes to lay out on the big, flat deck of the open hull.
I asked Heath to sell me the boat, but he said that it was one of his favorite boats and couldn’t bare to let it go…..coughs and mumbles under his breath “BOAT HOARDER” 🙂
I asked if I could start adding things to it and we’d just pay for anything we added, but it would still be his boat? He didn’t agree with that because he said it was just a work boat, and work boats shouldn’t have a bunch of creature comforts like I wanted to add.
One day Heath’s dad, Mike, was in the tiki bar by himself. I commented that I wanted to buy the boat but Heath wouldn’t sell it to me. Mike piped up and said “Well it’s our boat, but my name is the only one on the title. I’ll sell it today if you give me ‘X’ Amount of Dollars!” Before he could even finish his sentence, Cindy was running in the house to write him a check. He left with a check in his hand and told me he’d drop off the title on his next trip into town.
Heath called me early the next morning saying “So you went behind my back and bought the Aluminum Boat from my dad!”
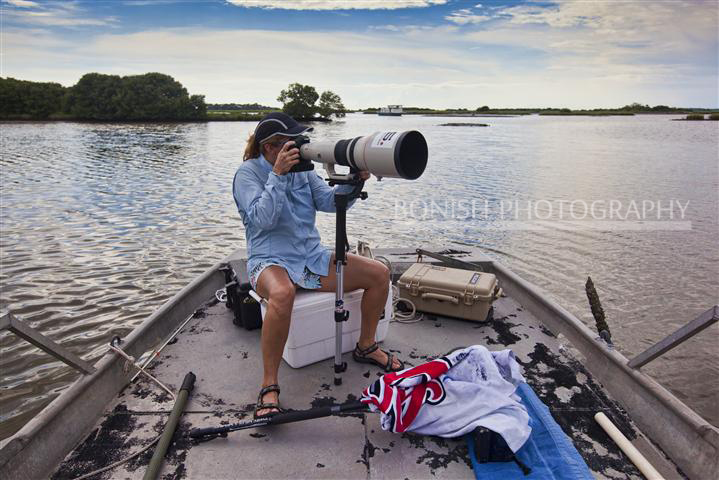
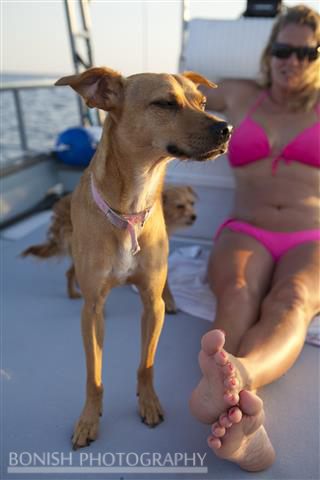
I laughed and said that I had to do what I had to do. He made me promise that if I was ever to sell it, I had to offer him the first chance to buy it back. I agreed but said that when I was done with it, he wouldn’t want it anymore. You can tell by the smile on Cindy’s face, she likes shooting from the deck of this boat.

I’m not sure who enjoys the boat more, Cindy or the Dogs!
Going from a Work Boat to a Comfortable Boat
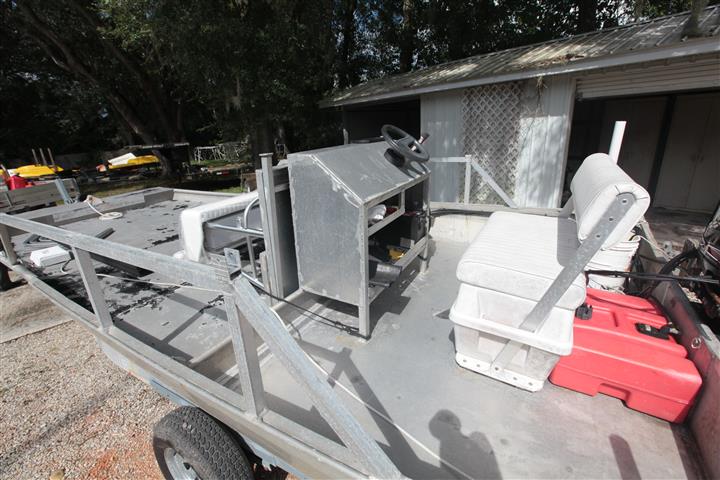
There were lots of little odds and ends that needed to be removed or fixed before we could even get to the big stuff. We brought the boat to Troy over at Williston Marine Metals who was the fabricator that made my drawings come to life. Troy is known for his fabricating and his work is so particular, it looks like it came from the factory. I cant say enough about the quality of work he does. I’ve always liked the saying “Good Work Ain’t Cheap, and Cheap Work Ain’t Good!” Troys work is beyond good, and his prices are beyond fair.
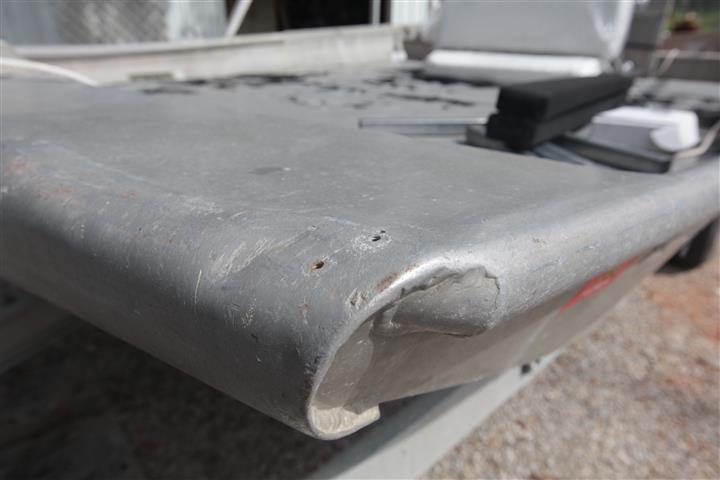
This big plate was right in the middle of the bow where the girls always liked to sit. It meant that you couldn’t lay down up there and people were always tripping over it. I had Troy remove it and fix the aluminum in that spot so it would just be smooth up front. Now it’s the perfect flat spot on the bow of the boat to lounge while floating.
Proper Boating Attire
There were multiple holes in the hull from various things that had been screwed on or mounted to the boat, but had since been removed. I went around with a Sharpie marker and circled all the holes we could find and had Troy fill in the holes with his welder.
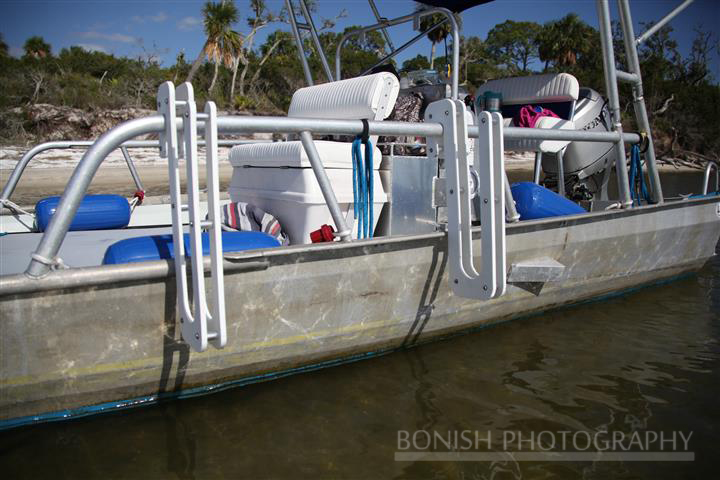
Heath had a railing welded along the sides of the boat out of square aluminum stock. At one point, this had held a bimini top that has long since been lost. There were sharp tabs for the bimini that I had ground off awhile back, but the square stock wasn’t something that was comfortable to sit on or lean against due to its sharp edges. I’d try and warn people not to lean against it while on the boat, but everyone would, and everyone would complain of how sharp the edges were.
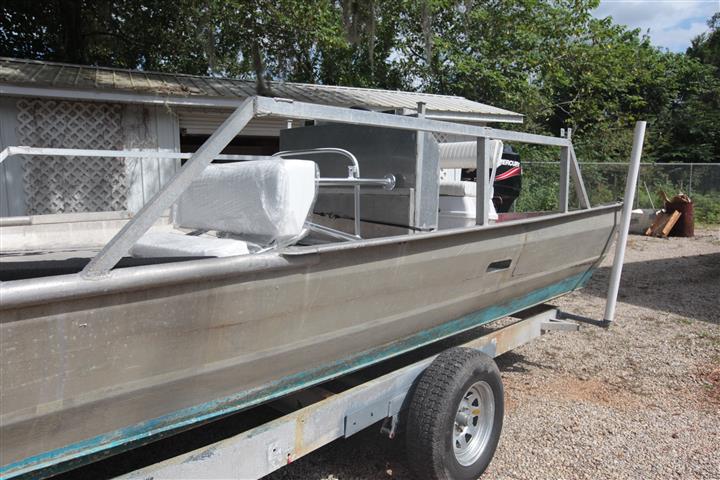
I had Troy remove that square stock and fabricate up something similar, but use big, round aluminum stock instead. This would also become the base for the folding bimini arch, so he incorporated it into that. The new railing is much stronger, looks more aesthetically pleasing and is much more comfortable on your butt and legs if you’re leaning against it or sitting on it. The railing also holds our LED Lights and Troy hides all the wiring inside the railing so it’s out of sight and somewhat protected from the elements.
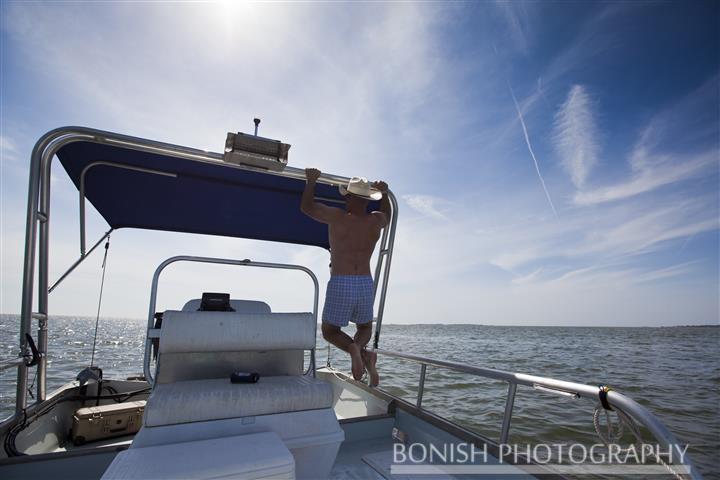
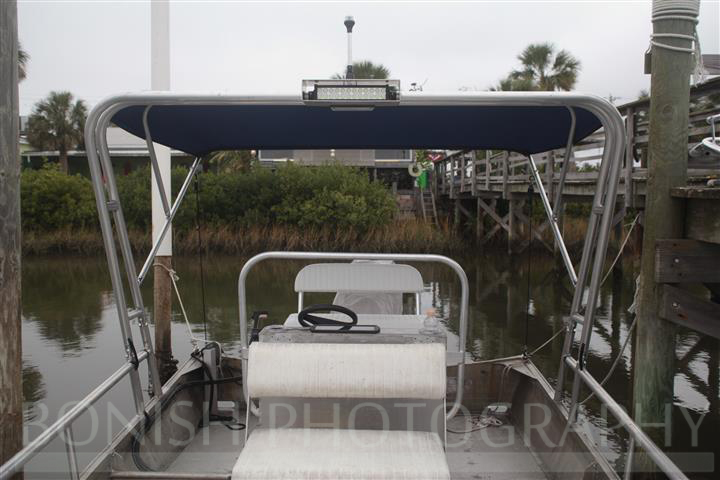
The next thing Cindy and I wanted to do was put some sort of bimini top on the Honey Badger. This top had to do multiple things and be built strong enough to survive the abuse we put the boat through.
The main thing this bimini top had to accomplish was to provide shade for me since I hated being stuck out in the sun all day, but it also had to leave the front portion of the deck where Cindy was always laying open so she could still have her sun to lounge in.
Since we were so used to being able to fit under all the bridges in town no matter where the tide is at, a fixed T-Top was out of the question. We needed a top that was able to be folded down quickly to allow us to get under the bridges, then put back up as quickly as it came down.
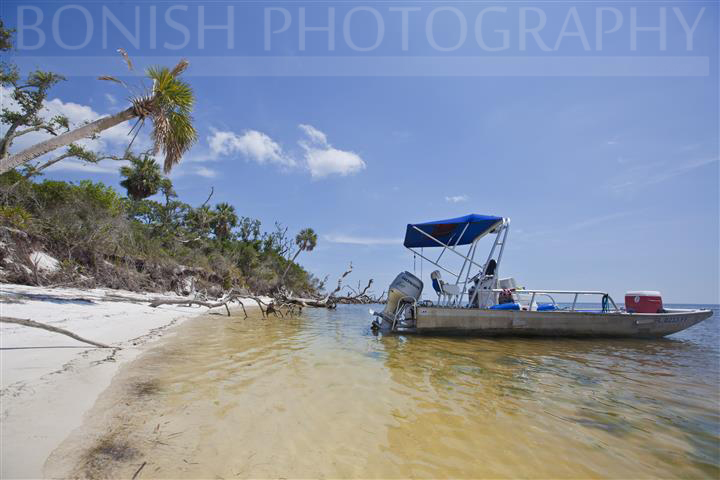
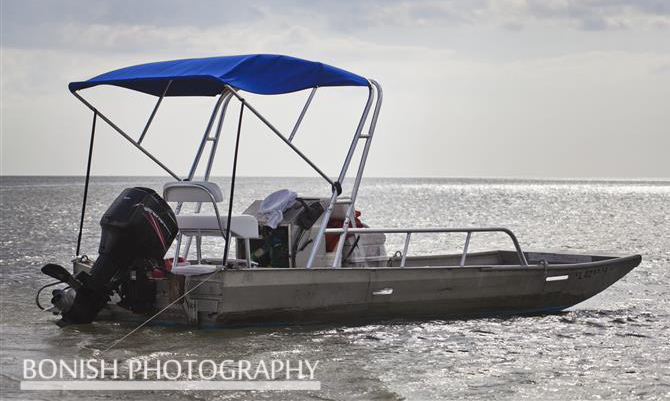 Troy used his expertise with a welding machine and made us one of the coolest folding bimini tops I’ve seen. Slowly the boat was becoming the perfect hidden beach, back-water explorer in the Cedar Key’s area. It’s wide enough to be comfortable and ride very dry, yet it runs shallow enough to get us into areas most cant even think of.
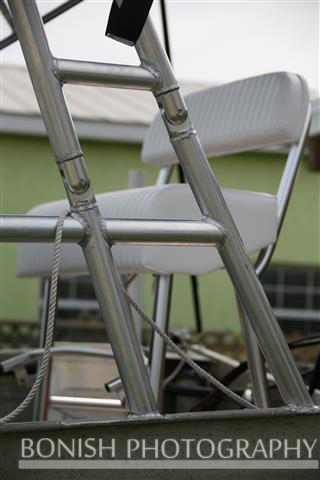
Here is a close-up of the hinges to the Bimini Arch. The back section has a pin we can pull out and the front section acts as a hinge allowing the bimini to fold forward and lay on the railing. These hinges are super, beefy with multiple welds to aid in the strength. This is also the way you fold it down while transporting it on the trailer. We simply release the two straps holding the bimini tight to the back of the boat, and it’s down. When you fold it back up, you hook the straps back up and off you go with comfortable shade over the center console riding in style.
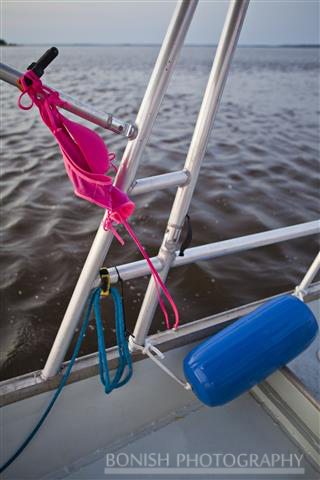
We use the Ratchet Tie Downs that use a quick release and have heavy duty polypropylene rope with rubber coated hooks on each end. We had used these for years to hold down our kayaks on the roof of the truck, and they held up to 4 full years of being on the roof of the truck in every type of climate you could throw at them. So far, they’ve held up to solid salt water life pretty good. I highly recommend them if you need to hold something securely, but need to release the strap and re-attach it on a regular basis.
The aluminum arch itself is doubled up for strength, and is strong enough that I can hang from it and do pull-ups without it even sagging or straining, in case I need to get a quick chest pump while out on the water. (That’s a Joke) When most bimini tops are constructed from flimsy 1/2″ or 1″ thin walled aluminum tubing, this is thick walled 2.5″ stock that can take a serious beating. Something tells me it’ll last for years without any maintenance. Plus, Troy’s welds look as professional as they come. I’ve seen some welds that resemble bird droppings, where Troy’s look like a stack of Dimes sitting around the base of the tubing.
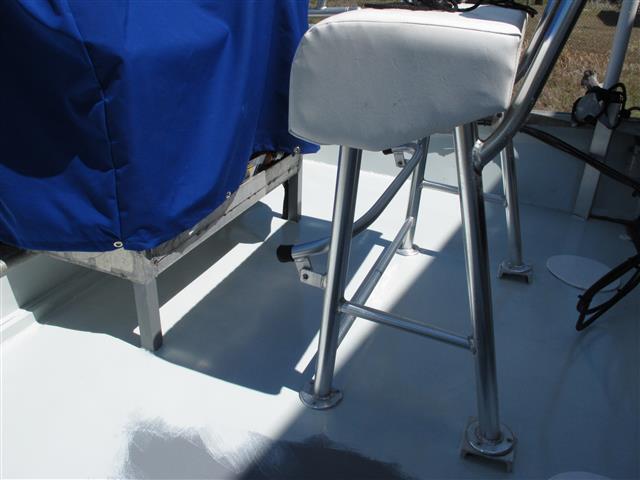
Next we attacked the seating since everyone loves to sit down or chill out while out on the water. Back when Mike and Heath had the boat, there was no seating what so ever up front since it was kept open for working while they were planting clams. There was a small cooler/seat mounted behind the center console, but if you were to sit on it, you couldn’t see over the center console, so you couldn’t really use it while piloting the boat.
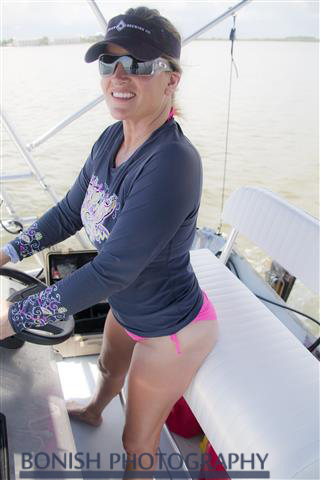
 I wanted a seat that would put me up above the center console so while I was sitting down and piloting the boat, I could actually see where we were going. Something that couldn’t be done if I was to sit in the current seat. We had Troy move that Cooler/Seat up front to add more seating for others riding the boat, and had a custom seat/leaning post built that would get mounted behind the center console.
 This leaning post has a space between its legs that fits a Igloo Marine 54qt Cooler snugly without it moving around any or even needing to be strapped down. There is also storage under the seat to hold spare straps, first aid kit and other odd’s and ends. I might have Troy remove the current storage hatch and make a custom one that would hold the Canon 400mm lens with a body attached. I’ll probably have the new hatch lined with foam so the lens will ride in there snugly and you wont have to worry about it bouncing around or moving at all. This will keep it close at hand, yet keep it safe while on the boat.
 On the photo below, notice the foot rail on the base of the seat that flips up if you’re standing so it moves out of your way. Really nice seat and so much more comfortable than sitting low behind the center console. You’ll also notice the little risers Troy added to the leaning post base so it sits level. This was done because Troy didn’t make the seat for me, which was a mistake on my part. I hadn’t yet found Williston Marine Metals when I ordered the seat. Once I ordered it, I brought it to Troy to mount it and he said since the seat was made without the fabricator seeing the boat, it wont sit level, but once he started working on it, he made sure it sat level and was mounted the right way. Looking at how comfortable Cindy looks, you can tell it rides much better than before.
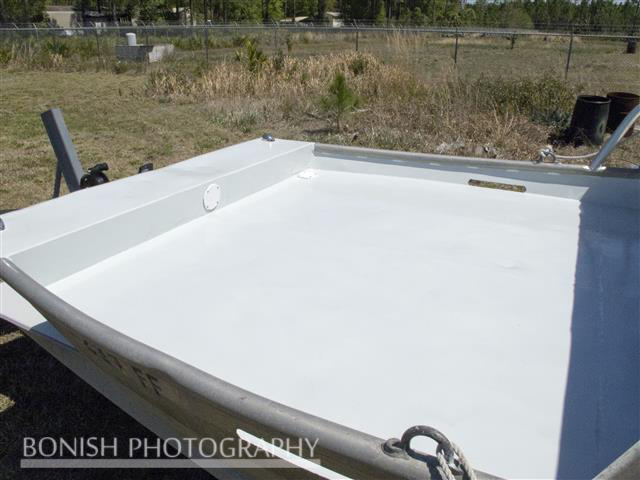
 One of the main issues with any boat you have is lack of storage. There is never enough storage and any available space should be used wisely or made to act as double duty. We had Troy install hatches on the deck of the hull so we could use the empty space below the deck to store snorkeling gear, swimming noodles and hold the center console cover while we’re on the water.
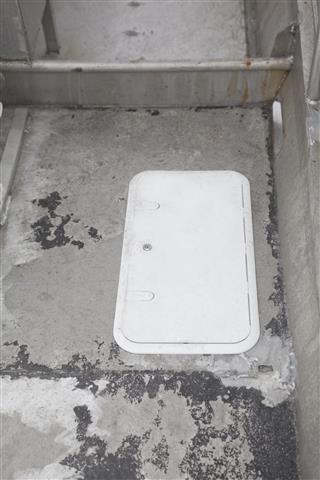
You’ll have to excuse the picture above, I wanted to show the deck hatches, but this was during the process of grinding off the old deck covering that someone had painted on the boat. We’ll get to that task later, just pay attention to the hatches themselves so you know what I was talking about.
The deck of the boat was just bare aluminum when it was the work boat. This was easy to maintain and there was no worries about what you were throwing or hauling on the boat, but it meant that if you wanted to lay out on it, you were basically laying in a frying pan and would scald any exposed skin that happened to touch the bare aluminum. There was also the eye sore of a deck covering that someone had put down a long time ago that I’m assuming was truck bedliner. The sun had wore it out and it was pealing up in a bad way. There were sections where the bedliner had worn off completely, but lots of areas still had remnants of this nasty black decking still covering it.
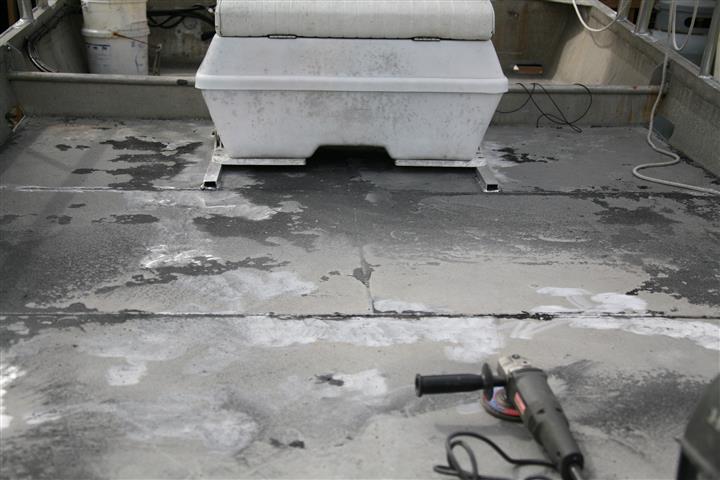
 My good buddy Scott Dombrowski had spent a couple of afternoons with a sanding disc hooked to the front of his drill grinding much of the deck covering off. I spent another few afternoon’s with my angle grinder and multiple sanding discs to finally get the mess off the boat and the deck prepped for paint. This was an awful task to accomplish and you were covered in black dust after working on it. I had tried to call every Sand Blaster in the surrounding area, but none of them told me they could take that stuff off the deck of the boat. Luckily, it only cost the time and effort Scott and I put into it and about $20 worth of sanding discs to get the deck down to bare aluminum and ready for primer. Thanks Scott for all the help!!
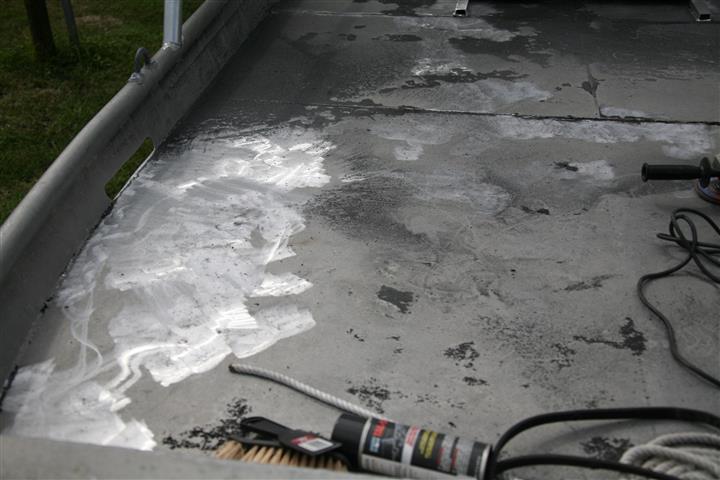
 I ordered some Aquagard 190 Aluminum Primer and Interlux Brightside Paint and put a couple of coats of each down. The primer was a dark gray and went on very easily. In the photo above, you can see the difference in color between the primer and the polyurethane. The Interlux Brightside Polyurethane Paint went on super smooth and actually hid many of the little divots and dings in the soft aluminum surface due to its thickness. We wanted something medium to light gray so we ordered the color Seattle Gray off the Interlux color chart. It came a little lighter gray than I thought it would be (almost white or just an off-white) but it allows you to walk on it on a sunny day with bare feet without scalding off the top few layers of skin and it doesn’t blind you like I thought it would.
 What a difference the paint made. Having the bedliner off and solid color of paint makes the boat look like a completely different boat. Of everything we’ve done, this has made the biggest difference in appearance in my mind. Just look at how nice the deck of the boat looks in the photos below!
HAHA! You’re supposed to be looking at the painted deck!
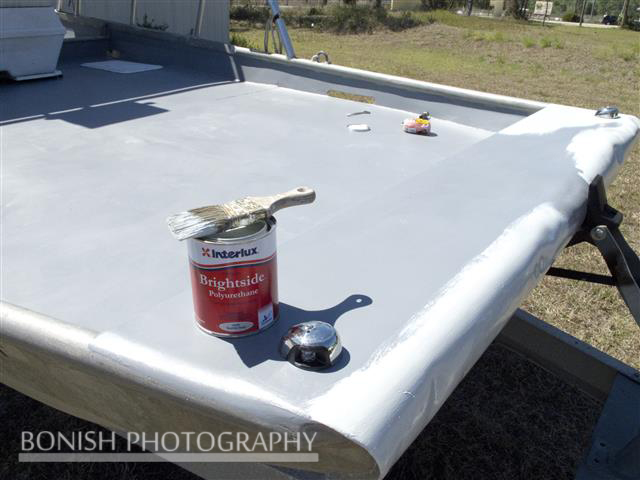
 While painting it, I put the first coat of deck paint down and gave that a day or so to dry. I came back a few days later and rolled on a second coat of paint. In the areas where we walk and I wanted to keep traction, I sprinkled sugar into the wet paint. Right after sprinkling the sugar, I then rolled back over the sugar with the roller without dipping it back in the paint. This blended the sugar into the wet paint with a thin coat of paint over top the sugar with what was left on the roller pad.
A few people had said to use sand from the beach, but upon doing some research, I read where people complained about the sand being too abrasive. Each person said that they used sugar their second time around and it was far less abrasive than the sand was. I figured if the sugar wasn’t sticky enough, I could always go back with a second application or just move up to the coarser sand. In the end, I like the texture of the sugar and it was super easy to apply evenly because of how fine the sugar is.
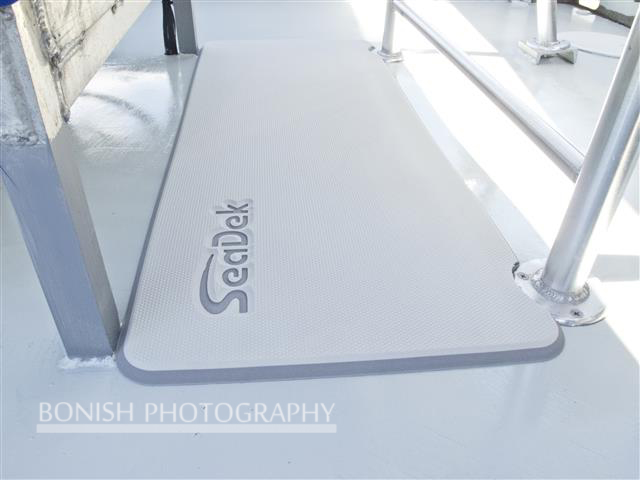
While at Troy’s shop talking about finishing the deck of the boat, he showed me a product called SeaDek he has used on a few of his boats and had high praise for. It’s a thin padding (5mm thick) that you stick to the deck of the boat much like you would a sticker. Super easy to apply and it adds a bit of cushy to the tushy when sitting or laying up on the deck. It also has a slight texture to it so it keeps the feet stable even when it’s wet. Cindy and I were able to cut and install all the deck padding in about an hours time. It actually cut easily with scissors after we had measured it out and made templates. If you’d rather have the company do all the cutting for you, you can order a template kit from them, lay it on the deck of your boat, mark all the measurements and mail it back to them. They’ll then make the padding to your exact measurements and you’ll be ready to apply it without any cutting. Pretty slick if you ask me.
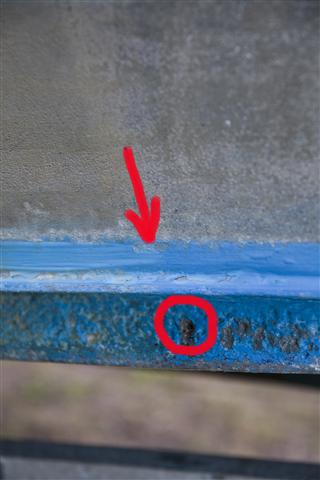
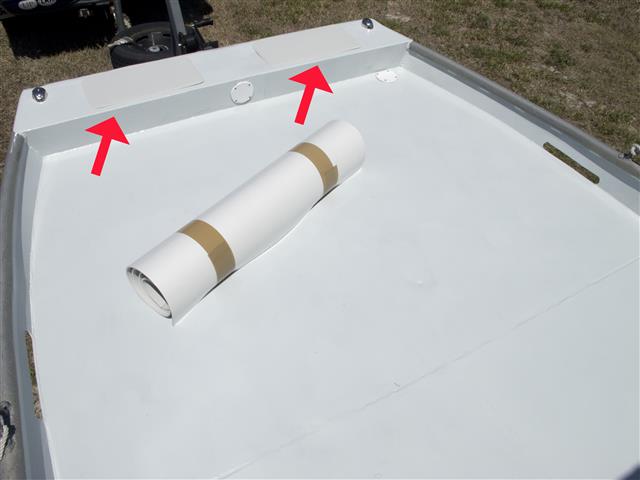 I also ordered a few pre-cut pads to put up front on the bow of the boat where the girls always sit so they can dangle their feet in the water while at anchor. The two red arrows show where the pads are placed. The roll you see is the SeaDek padding still rolled up before we did the measurements and cutting. That’s how it came shipped.
While ordering the sheets of SeaDek for the front of the boat, I ordered a Helm Station Pad that is 3 times as thick as the normal padding for in front of the leaning post.
 This makes standing and driving the boat so nice. It’s like you’re standing on a big, 15mm thick gel pad the entire time and helps absorb any of the shock from the waves. The bare aluminum was always very cold on your feet once we had put the Bimini Top on, so if you were out in anything but the heat of the summer, your feet were usually numb from being so cold. The Helm Station Pad helps to keep your feet warm since it’s like having them on a Wetsuit the entire time. It’s little things like this that make all the difference. I always love the little things the most.
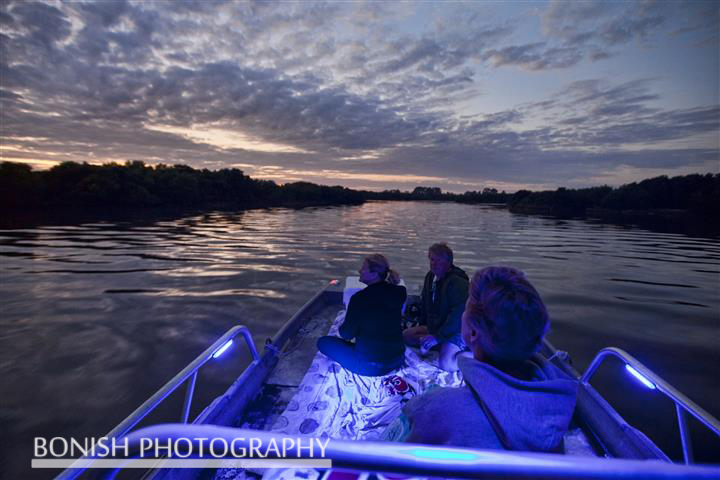
 Since it was just a work boat and clammers don’t work at night, there was never any running lights installed on the boat. We had Troy wire up LED navigation lights so when hanging out past sunset, we can be legal and safe on the water. We also had Troy wire up a bunch of LED Lighting in other areas of the boat. This means we can leave the lights on for a long time without the boat running and it doesn’t drain the battery. Actually every light we installed on the boat is of the LED type. It’ll be interesting to see if they last as long as they claim to.
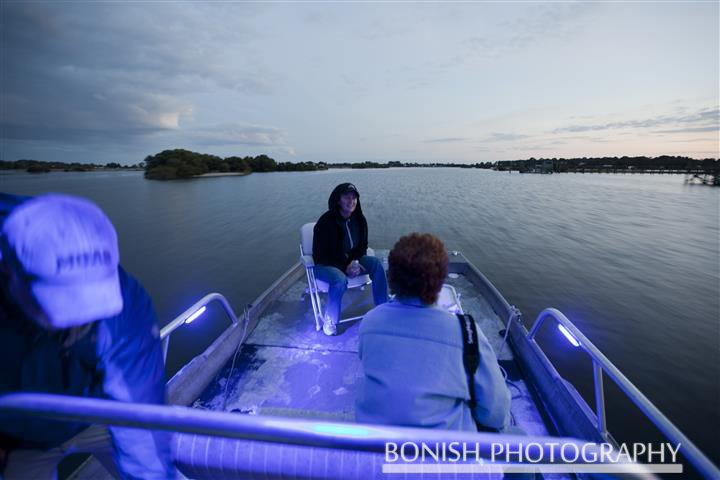
We have 8″ strips of Blue LED’s along the sides of the boat, and another 8-Inch LED Lightstrip under the Bimini so it lights up the center console. I’ve been told by everyone that sees the boat running in the dark, that it has this amazing blue glow to it while on the water.
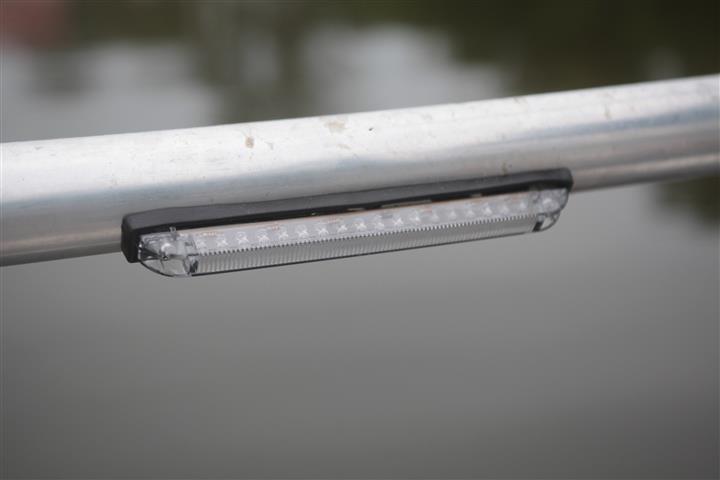
LED Strips running along the bottom edge of the railing
 I found a big LED Spotlight that Troy had to make a custom aluminum hosing for that is mounted up on the Bimini Arch. We had first tried to mount it without the housing, but Troy said that too much of the light was bouncing off the deck of the boat, so the aluminum housing deflects some of the light up and off the deck. Plus it’s good protection for both the light itself and to keep it out of the harmful sun since it just sits outside 24/7.
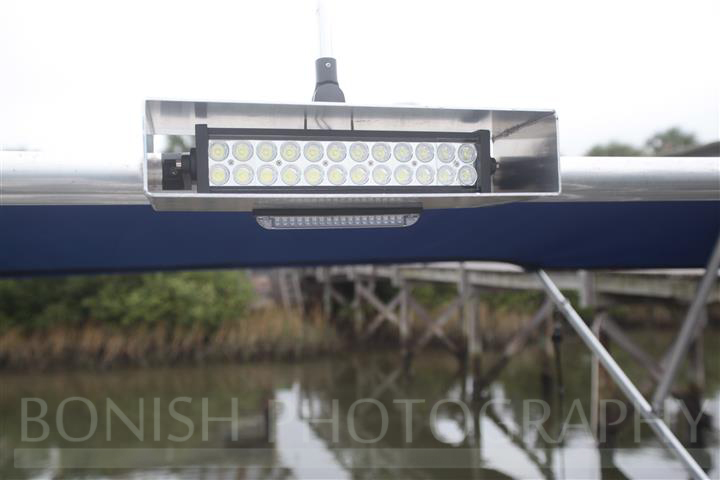
I was wanting to go with a Rigid LED Spotlight which sets the bar for LED Spotlights, but they were way beyond the cost of my thin bank account. Searching the intraweb, I found a LED at Northern Tool that was within budget. It had a good warranty, so I figured I’d order it and see how it worked. This lightbar from Northern Tool was only $250 and puts out a blinding 4320 Lumens. This has been a work in progress to figure out how to get the light to shine forward without reflecting off the deck of the boat.
Troy said while installing it to the bimini arch, it was just too reflective off the deck of the boat. This was another reason for the aluminum housing around the light itself. He tried to make the housing keep some of the light off the deck, but it’s so dang bright, it still blinds you at night. It is amazing to kick this thing on while running through the channel markers and have everyone of them light up instantly. We tend to just turn it on every so often to illuminate the markers and know where they are, then turn it back off to save our night vision.
 Down the road, I’m thinking that Rigid makes some LED’s that can be recessed into the hull. I’ll probably save up for a few of those and have Troy mount them right in the front of the boat so there will be zero reflection issues and it’ll only illuminate out in front of the boat.
A good friend of mine showed me a photo of his boat that had LED Underwater lights mounted on the transom of the boat so while underway, the wake would be lit up. This looked super cool and right away had me looking for affordable underwater lights. Using the words ‘Affordable’ and ‘Underwater LED’s’ in the same sentence is somewhat of a joke because Underwater Lights for boats can cost more than we have in the boat all together.
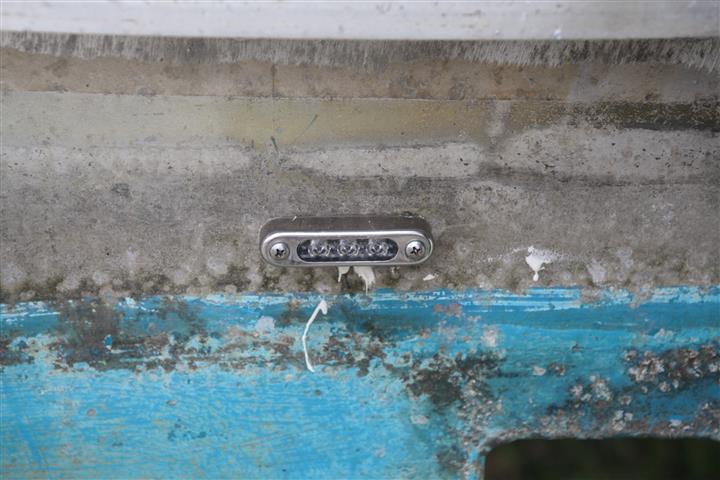 While at Wal-Mart of all places, I was in the boating isle buying some 2 Stroke mix for the outboard and saw some Attwood Underwater LED’s that only cost $25. I figured for that price, I could afford to see if they made a difference. Problem is, the wake looks really cool lit up with these lights installed, but like a typical man who has a fascination with flashlights and anything that glows, these lights aren’t that bright. They light up the wake OK, but not as bright as I want them to.
 Rigid has some Underwater Lights that are beyond bright, but again they are more expensive than the boat is. I guess I’ll just have to keep saving up and add them at a later date.
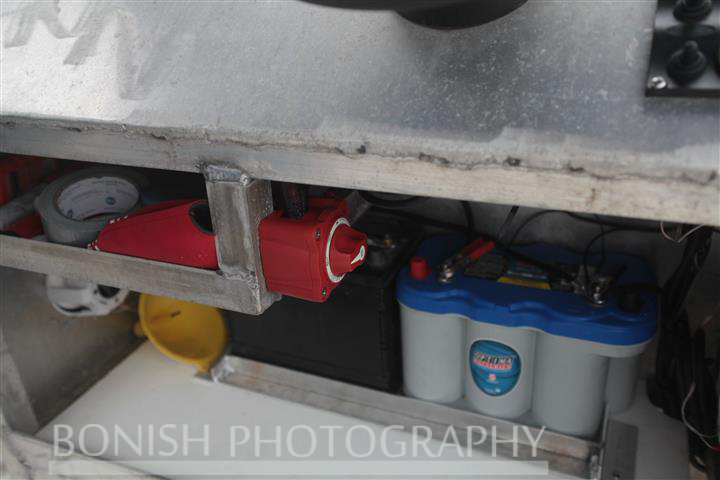
A few other things we’ve added that make the boat more comfortable is a dual battery set-up with a full 5 Watt Solar Panel to keep them topped off with power. There is nothing worse than turning that key and hearing the motor drain the last bit of battery left. An Optima Marine Battery solved all of those issues. These deep cycle batteries can last all day long and with that solar panel recharging it, we can literally lay around for hours with the radio blasting, the chart plotter left on and our phones charging without a worry of draining the battery or being stranded on the water. Again, Troy mounted these and wired them up so they look factory and kept everything very clean and simple.
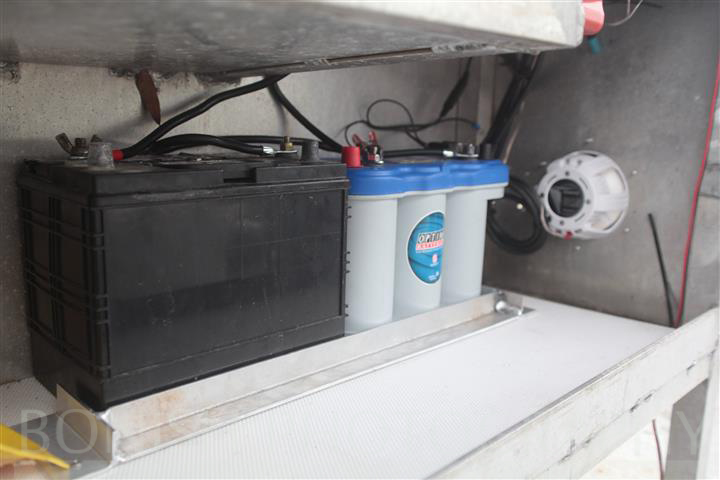 Troy also added a selector switch so we can switch just to the Optima Battery when hanging out, then switch back to both batteries when the boat needs to be started.
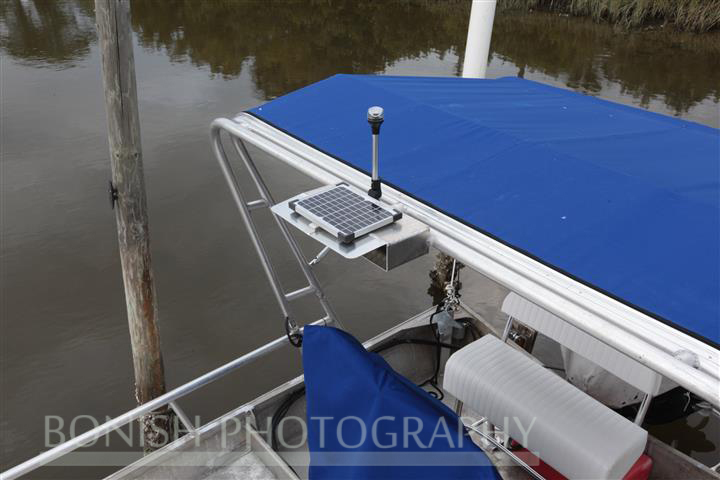
Troy mounted the solar panel up on top of the bimini arch so it’s always in full sun and out of the way. The best thing about it is you just forget its up there keeping the batteries charged, but you never worry about going out to the boat after a few days without running it and finding a dead battery. Another of those options that every boat should have as standard equipment.
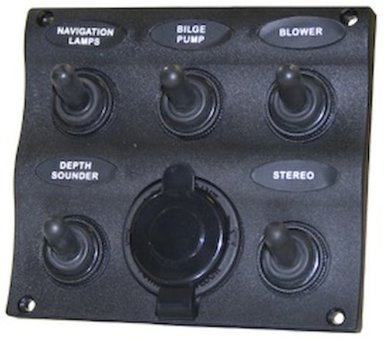
 All of these lights, controls, and add-on’s are turned off and on from a Seasense Marine 5 Way Switch Panel. I like that this panel has a 12volt plug to either bring along a phone charger or have access to a 12volt plug for other accessories others might bring along. The radio we installed also has a USB plug in it that has enough power to charge the phone while it’s plugged in. Although the radio has the Sirius Satillite hooked up, we use the Pandora App off our phones quite a bit for a variety of music.
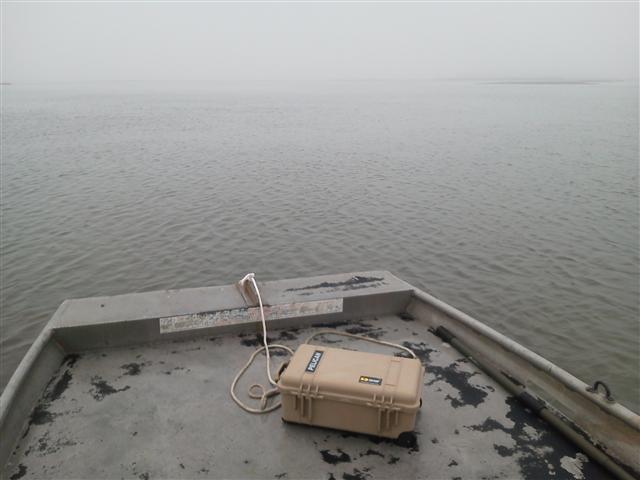
And then the Chart Plotter. All you have to do is read our Funny Blog Post about the day we got lost in the fog in Cedar Key to know why this purchase was made. It’s self explanatory and another of those options that you wonder how you lived without. We went with the Lowrance HDS-5 GEN2 Chartplotter. It’s an amazing piece of gadgetry that I’m still learning more about it with each day spent on the boat.
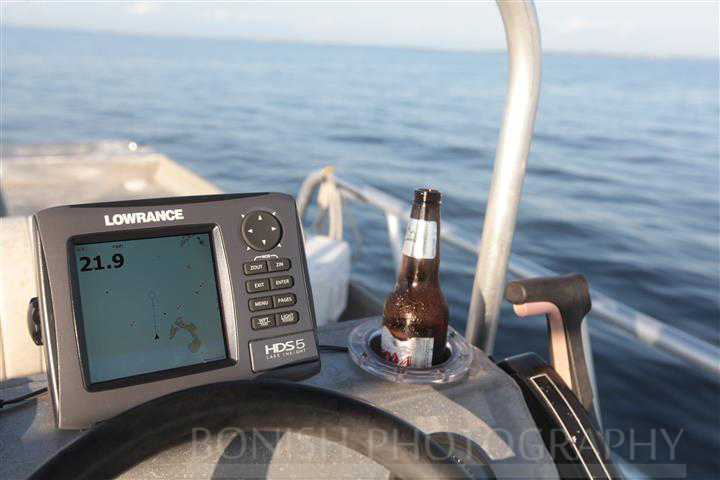 It does more than I will probably ever use, but what it does the best is tell me where I am and what is in front of me when I cant see due to bad weather or fog. I like that it tells me my speed, my depth, my direction and where the islands are adjacent to our location. It has a ton of mapping options and has super cool 3D maps installed. The Lowrance, is down right sexy, but I’m keeping my old 2 Point Navigation System as a back-up just in case.
The Standard 2 Point Navigation System
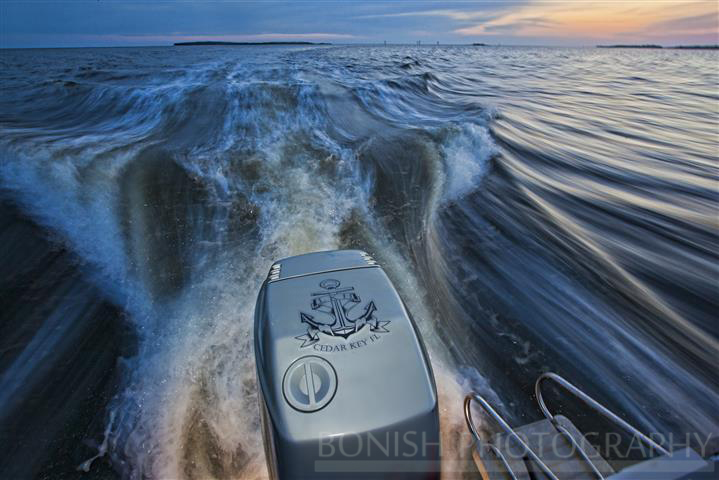
On to the Outboard. One thing Mercury motors are know for are their stickers that don’t like to stick to the cowling and the cowling paint that doesn’t like to stay on the cowling. I wonder what this Cowling is made of? If I want to replace the Mercury stickers, the cheapest I could find a pack of replacements for was close to $100 and that’s just for the stickers. Since Mercury doesn’t pay me to advertise for them, I decided if I was going to replace the stickers, I’d do them with my own logos.
I contacted a buddy of mine who is pretty good with automotive paints and talked to him about sanding down the cowling, re-spraying it in a two-tone scheme, applying my custom stickers and finishing it off with a clear coat over top the stickers. Some friends of ours, Debby and Bill from Kasson’s Wild Ride had ordered custom Vinyl stickers for their canoe and she said the company was fast, inexpensive and the vinyl was pretty thick. I figured I’d try Lettering On The Cheap out and see what they could do.
![]() I made my own custom logo and had them print it out in heavy duty UV coated vinyl. A week later, I had my stickers in my hand and brought the cowling to Jarrod so he could get to work with the sanding and painting.
I made my own custom logo and had them print it out in heavy duty UV coated vinyl. A week later, I had my stickers in my hand and brought the cowling to Jarrod so he could get to work with the sanding and painting.
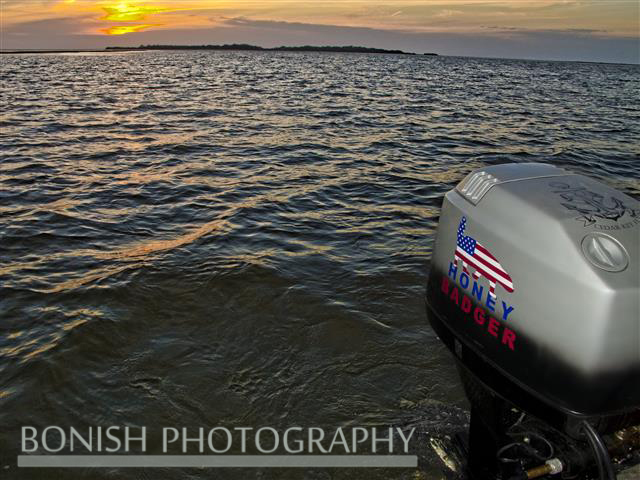
He sanded it down and sprayed it all in one day. I picked it up the next day after it had cured and it was back on the boat looking better than ever. I wanted the top of the motor to be a light color rather than normal black, hoping to help keep it a bit cooler. I’ll let you know how it holds up and how the stickers work compared to the stock Mercury stickers.
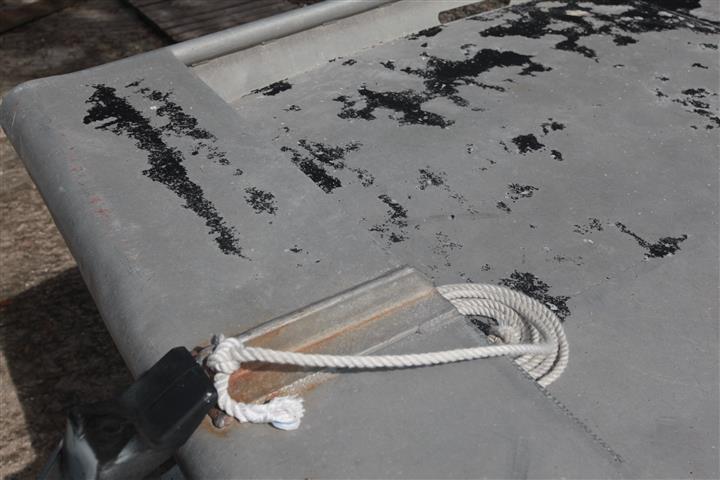
One final touch that I saw on Mike’s boat was a anchor holder to keep the anchor close at hand, but keep it from bouncing around on the deck of the boat. I asked Mike about it and he told me Troy had installed it for him. While the boat was at Troy’s, I asked him to make me an anchor holder and this is what he came up with.
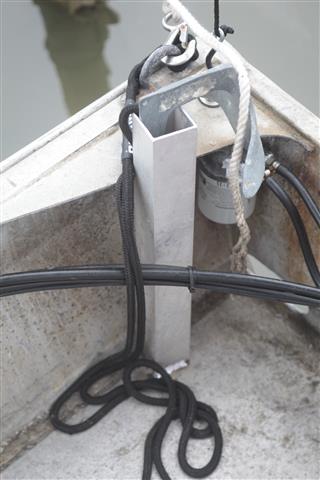
Simple, effective and always ready to pitch over the side
Last but not least, our cup holders. The boat was a work boat, so it never had nor needed cup holders. While looking around on the Web, I was surprised at how elaborate these could get, or how simple they could be found. The same friend that has the cool, underwater lights on his transom also had LED Cup Holders on his boat. I saw them once and knew I needed to have a pair.
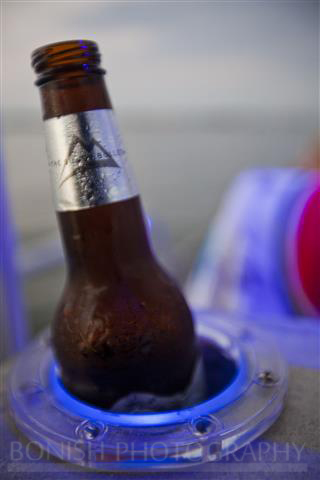
These look super cool if you have a clear cup or a clear bottle sitting in them as the entire bottle or glass glows. Another little thing that just adds to the boat.
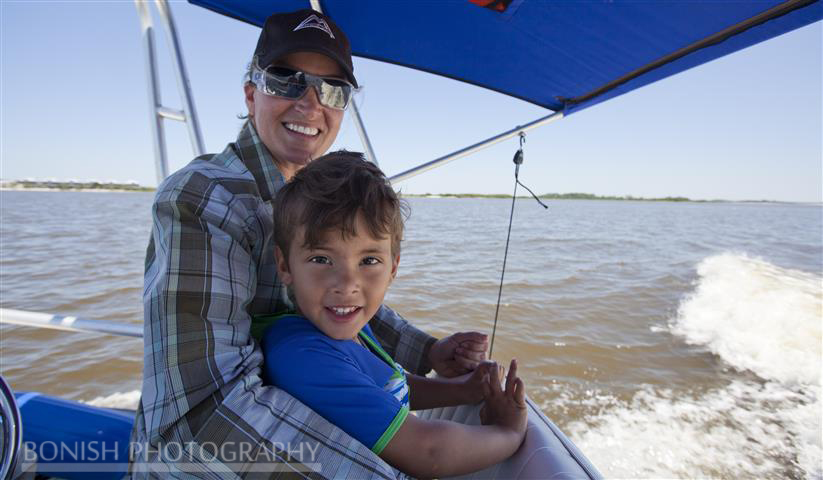
Cindy with her Grandson Jazper enjoying the boat! This is what it’s all about!
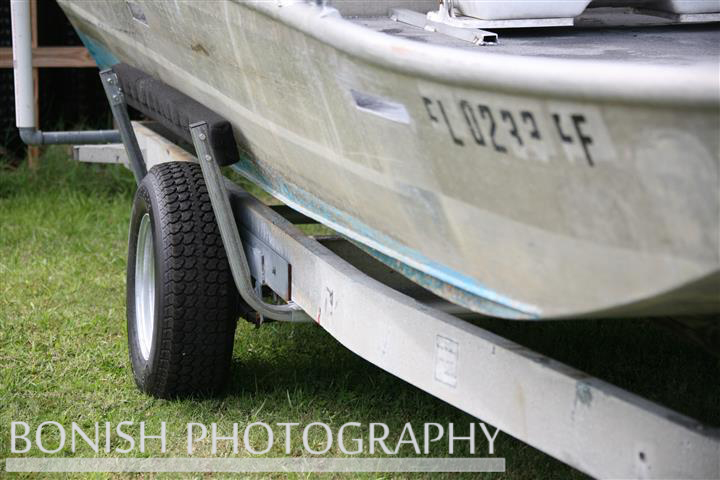
LATEST UPDATE: August 2013 – The Trailer – When we had bought this boat from Mike and Heath, the trailer that had come with it was nothing more than scrap parts that had been hobbled together from multiple trailers lying around Cedar Key. An old aluminum frame sitting out in the weeds, an even older axle that barely worked that had been taken off a dual axle trailer that was going to the dump. Couple of old 4″x4″‘s that were bolted down to act as bunk slides….etc. It was quite the sight, but it was a trailer, so I wasn’t complaining.
Since the boat had never left Cedar Key, and really never went anywhere more than a few blocks from Heath’s house to the boat ramp, the trailer had never even been plated. There were no lights on it and no winch to pull the boat up to the bump stop. You simply sunk the trailer far enough into the water that the boat rode up till it hit the bump stop and you hoped it didn’t slide back off while you were pulling back up the boat ramp.
Seems very safe doesn’t it! The bump stop itself didn’t do much to hold the boat on since Airboat hulls usually have to have supports on their trailers to hold the bow of the boat to keep it from bobbing. This trailer didn’t have one of those supports, so while towing it down the road, the boat bounced like it was riding over small waves the entire time. It made for a butt clenching drive anytime you had to tow it anywhere farther than a block or two.
Cindy and I like to go exploring, and since this is strictly a bay/shallow water boat, you cant take it out in big, open water if you want to make the trip down to Crystal River or any of the neighboring waterways via water. You have to pull the boat out and tow it there.
First thing I did was hook up some lights so I’d be legal while towing it into Chiefland to get it weighed. Once I had it weighed (it was only 590lbs in case you’re wondering) I towed it to the DMV where I registered it as a Home Made Trailer and got a plate for it. That was surprisingly inexpensive and after giving them $80, I was finally legal. Having it 100% legal was something Cindy and I wanted to be sure of since anywhere we tow it, it usually draws quite a bit of attention. Now we were free to go explore.
That was done awhile back since I had been trailering it over to Troy’s which is in Williston, an hours drive from Cedar Key.
Trailer Guides and New Rims and Tires
First thing we did was have Troy weld on some Bunk Guides so while pulling the boat onto the trailer at the ramp, the guides keep me centered and I don’t look like an idiot if the wind is blowing or the boat ramp has a current to work against. If you ever want some cheap entertainment, just go hang out at the Boat Ramp on a Saturday afternoon when all the fisherman are trying to load their boats. Those that don’t have Bunk Guides can be downright hysterical with the fits they throw while trying to get the boat onto that trailer.
On one of the visits to Williston Marine Metals, I had asked Troy about fixing the trailer up itself, but he refereed me to Cliff over at B&S Trailers in Reddick Florida. Troy said Cliff made one thing, and he was the best there was at welding up custom trailers. That was enough for me.
Taking the Trailer over to B&S Trailers in Reddick was something I had been saving my pennies for for months on end after Troy had told me about it. When I finally had enough saved, I hooked the boat up and brought it over there. Reality was I didn’t have enough saved, but after so many people would walk past the trailer and make comments about the fact that the main head tube was rusted out, or point out that the axle of the trailer was too far forward so it made it tow funny, or they’d say “Man I was behind you the other day while you were towing that boat, and it was bobbing so bad I had to pass you. I mean I was afraid it was going to bounce off the trailer!”
Cindy heard a group of guys saying this kind of stuff out at the tiki bar one night and said to me “Ok, Take the trailer in already! I don’t want us to get in an accident because of that crappy trailer!”
When I pulled into B&S and one of their welders walked out to ask if he could help me, he took one look at the main head tube of the trailer and almost shouted “Holy Shit Dude, you towed that thing here like that!?!” I sort of shrugged and said “Well yeah, is it that bad?” He laughed and asked where I had towed it from. When I told him “Cedar Key“, his eyes about popped out of his head.
He looked at the axle and said “Do you know that the axle is installed backwards on this trailer too?”
By this point I was just thinking ‘Ok, Let’s just slide this boat onto one of those brand new trailers, I’ll max out my Credit Card and tow the boat back to Cedar Key‘
Cliff, the owner and main guy finally comes out and the first words out of his mouth after I introduce myself and we shake hands is “Do you know that axle is on backwards?”
Then he looks at the main tube and shakes his head. He says “Wow, you actually towed this here?” Well that’s 2 for 2 🙂 I knew Cliff was for real and straight up when he said “Even if you don’t have me do ANYTHING to your trailer, I wont let you leave here till I fix the rusted out main tube and flip your axle around the right way, that’s just not safe to be on the road.”
So we start going down the list of things that need to be done to my trailer. This list got long really fast. I seriously was thinking it would just be cheaper to buy a new trailer rather than try and even salvage this old jalopy.
We went into the office so Cliff could punch some numbers and he surprised the hell out of me with his final price. A brand new B&S trailer, single axle with all the bells and whistles would have cost me about $3500, which is actually not a bad price at all.
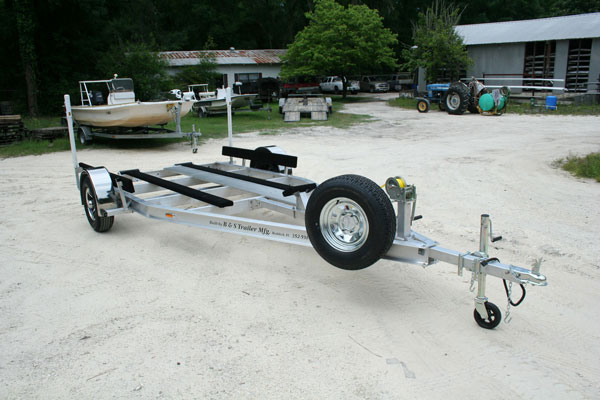
Stock Photo off the B&S Website of one of their Standard Airboat Trailers
Seeing the way the welders fabricate the trailers up specifically to each boat was quite impressive. Everything is aluminum or hot dipped galvanized and the welds are almost as nice as Troy’s. Just to be fair, Troy has some of the cleanest welds I’ve ever seen.
After crunching his numbers, Cliff said he could move my axle where it would balance the boat out the right way, flip the axle around so it was actually mounted the right way, re-do my shoddy wiring set-up for the lights so they’d work 100% of the time, weld in a new main frame to replace the rusted out one that surprised the hell out of everyone that it had even made the trip from Cedar Key, add a ladder to the front of the trailer itself to be able to get in and out of the boat while its being towed, add a bump stop to keep the boat from bouncing while being towed, and mount up a new swivel jack on the tongue. All this for under a $1000. I was sold on that and unhooked it from the truck.
We both agreed that once his guys got into the axle ordeal, they would use their own judgement on whether to just go ahead and replace the entire axle assembly or try and re-mount mine. He told me if worst case scenario the entire axle, hubs, shackles and mounting hardware had to be replaced, I’d be looking around $1200 total.
I had wanted to have new bunk slides installed, but after he had crawled under my boat and saw all the barnacles on the bottom, he talked me out of it. Cliff told me that unless I was going to keep the bottom clean, (Something that we don’t do because we leave it in the water too much) I’d just tear up the bunk slides the first time I pulled the boat on.
I explained the reason I wanted new bunk slides was the 4″x4″s that were under there always floated up when we’d back the trailer into the water. He laughed and said he’d be sure and mount them correctly so they wouldn’t do that anymore.
On the ride home, I kept wondering why I hadn’t just told Cliff to go ahead and do the new axle? I mean hell, if I was going to be doing all of this, why not just start fresh and get a brand new axle and everything that goes with it? A day or two later, he’d call to let me know that the axle was shot, and they were going to go ahead and replace everything, and Cindy and I breathed a sigh of relief. We had talked it over when I had gotten home and both agreed we’d rather just have everything new.
We had put brand new rims and tires on the trailer when we got it, so Cliff said “I’ll replace everything under the trailer except those rims and tires, for some reason they look brand new.” They were probably all scratching their heads over that one? “This idiot has brand new rims and tires on an axle that is mounted backwards and about to fall off the frame that’s rusted so bad I can poke my finger through it!?”
When I got the call it was ready, I couldn’t wait to go get it. Cindy and I drove to B&S Trailers and once I happily gave them their money, I was amazed within seconds of pulling out of their yard. I’m not lying when I say I’d be clenched up as tight as I could clench my butt checks when I’d be towing this thing before. The boat would be bobbing so bad, I figured at any second it was going to just bounce right off the 4″x4″s.
 Now, it tows like a trailer should, and you forget it’s even back there. With all brand new suspension and hubs, it rolls like a dream.
 I’m not worried that the tongue is going to snap over every bump we hit, and since they replaced everything on the front of the trailer itself, there are all new chains, latches and electrical connections.
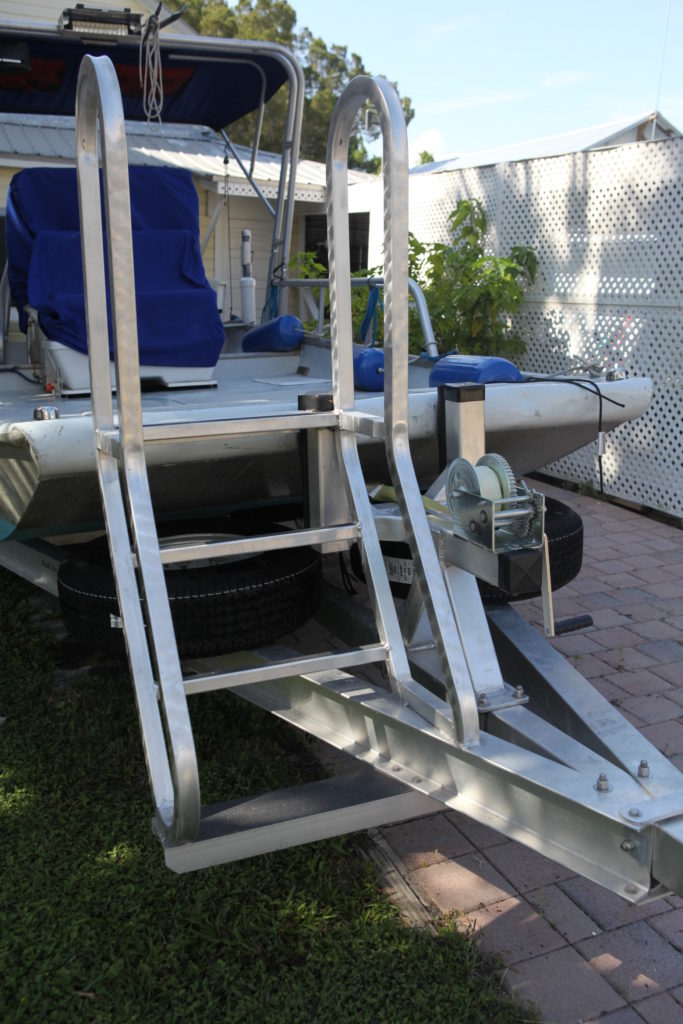
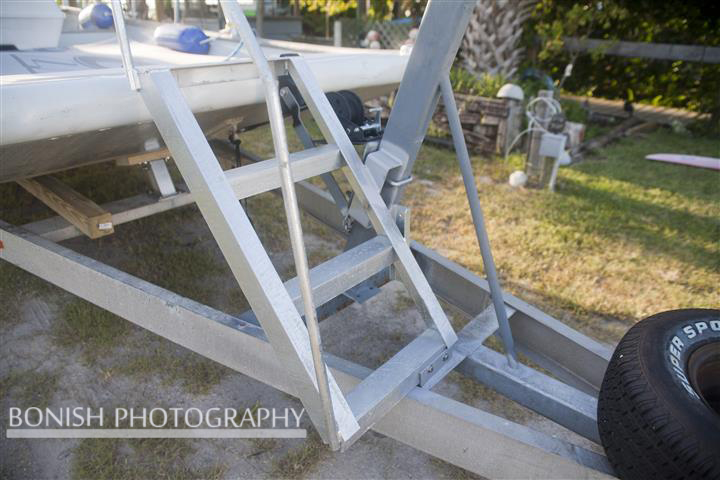 If you need to get up on the boat, it’s as simple as walking up a staircase from the tongue of the trailer. This is another one of those options that should be standard on all boat trailers. I took this photo the day we got it home. I’ve since put Grip Tape down on the steps so we don’t slip while walking up or down with wet feet. This ladder makes loading coolers, camera boxes and people beyond easy!
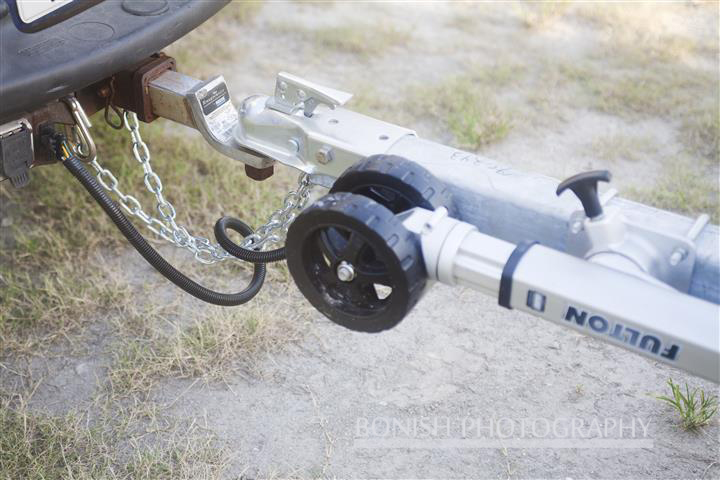
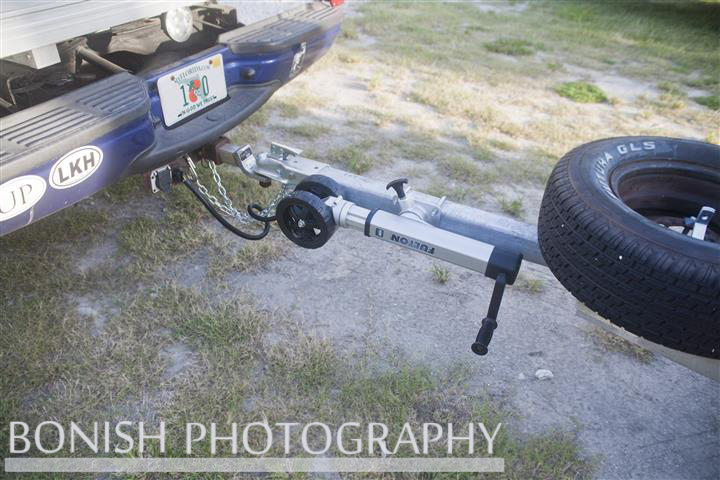 When you need to back up and hook the trailer up to the hitch, you simply have to get them somewhere close together. The Fulton Twin Track Marine Jack has two big wheels on the bottom that allow the trailer to be rolled right up to the hitch and hooked up even on grass or dirt. Once hooked up, the jack itself only needs a couple of turns to get the wheel off the ground before you pull a lever and the entire jack swivels out of the way. Man, it makes hooking up so simple and fast.
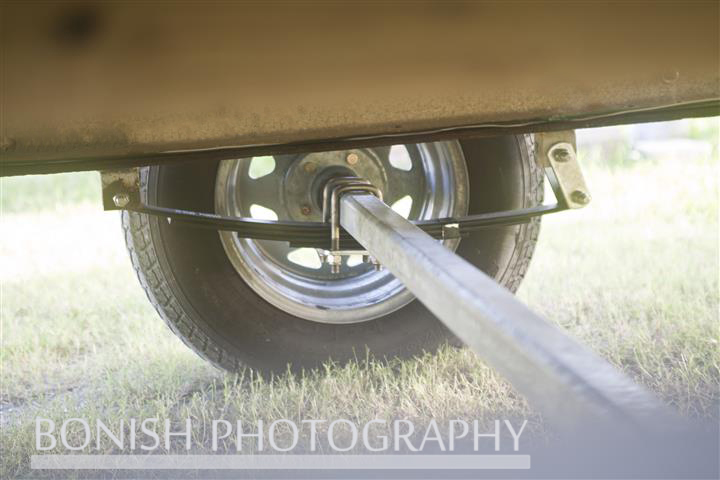
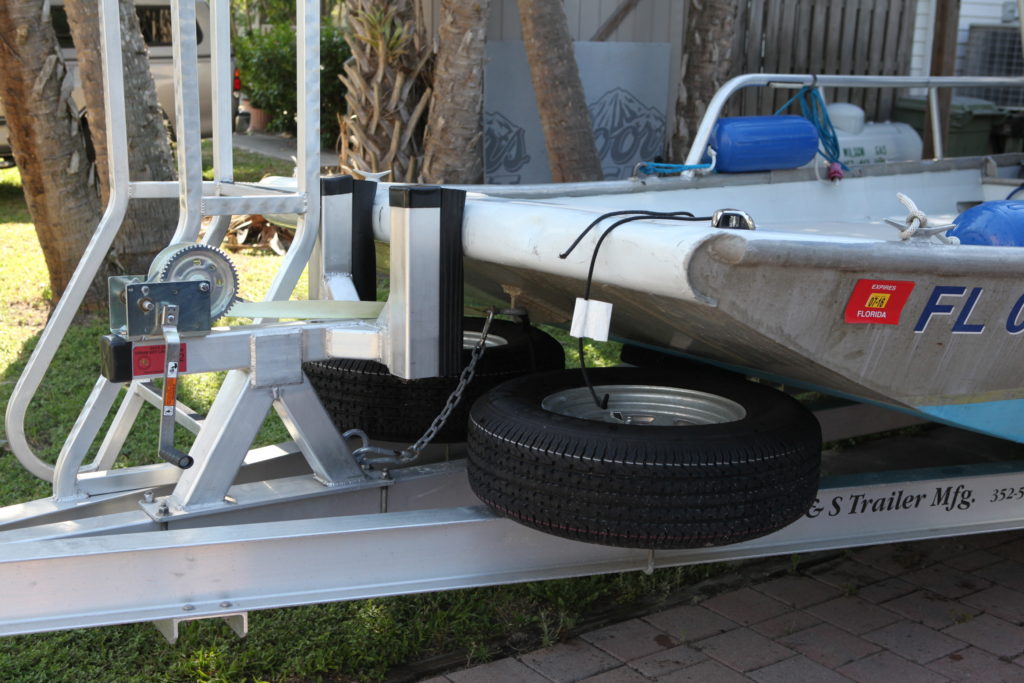
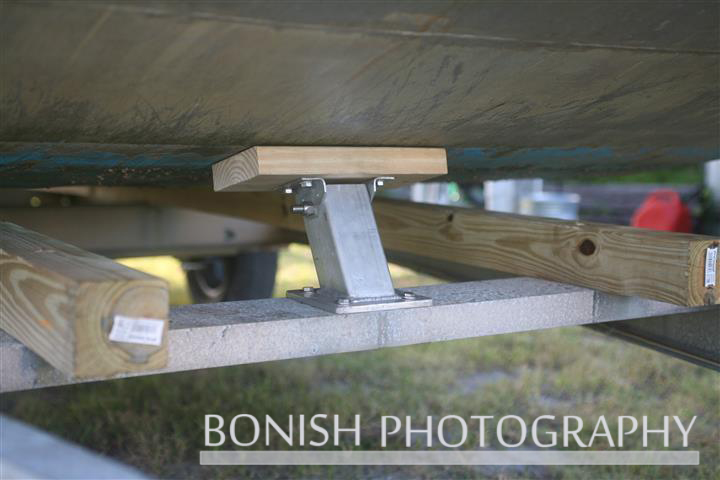 I thought I had mounted the old 4″x4″s correctly, but Cliff told me they were so rotted, the carriage bolts I had used were just pulling right out of the wood. He went ahead and put down brand new treated 4″x4″s and mounted them with all new hardware. You can see in the image above how important that Bow Support Brace is. Because of the big rake design of the hull, the only part of the bottom of the boat that’s actually touching the trailer bunk slides is pretty far back on the boat. With the bow of the boat supported with that brace, it allows the boat to ride smoother on the trailer and not bounce all over the place. Makes a night and day difference.
Latest Update: January 2015 – A Lot of New Add-On’s
2014 was a great year for boating and the Honey Badger. We found that we’re usually entertaining on the boat with guests or friends visiting on a constant basis, and as we find ways to improve the creature comforts, we try and add them as soon as possible so we’re all as comfortable as possible.
Some of the minor things that wont really show up in photos include having the bottom sanded down to bare metal, had the pitted holes filled with epoxy and a fresh coat of bottom paint added. Repainted the top surface with a fresh coat of the Interlux Brightside Paint and cleaned up the wiring under the center console.
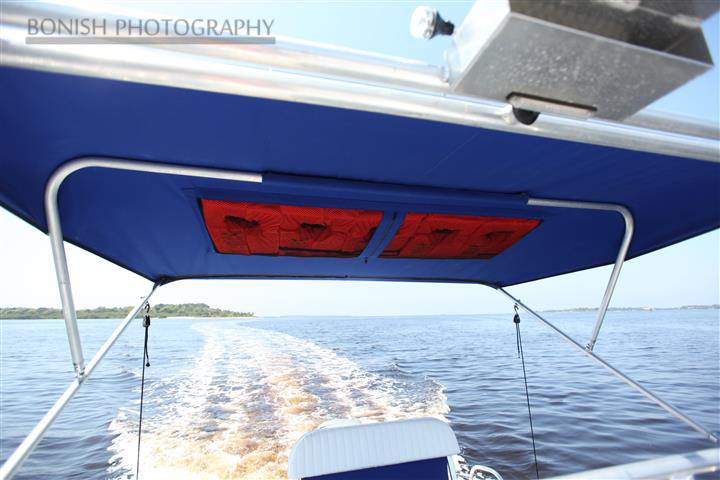
After we had the Bimini built, I didn’t like that we were storing the PFD’s in the hull of the boat. They tended to stay damp and get moldy if left down there, so while the boat was at Williston Marine Metals for one of her monthly check-ups, we had Troy sew in a holding net to the underside of the bimini top that keeps the PFD’s within a easy reach and keeps them shaded yet airy so they never mold or get wet.
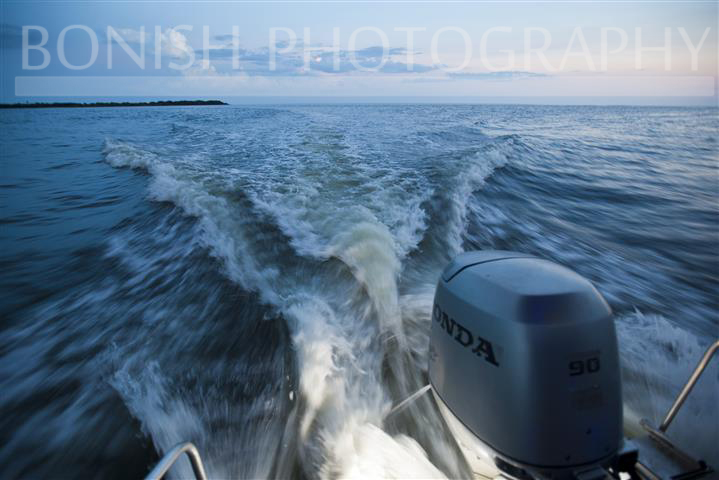
Our next and biggest addition was a 90hp Honda 4-Stroke Outboard
This was something that we had talked about for a long, long time. Our original Mercury 90hp 2-Stroke outboard was a fuel hog and smoked like a chimney. It hated idling around, rattled the boat something awful because of its 2-stroke nature and really only ran well if at full throttle. We both love to just idle around, take photos and entertain people. Neither of us are really into going full throttle and we’re both just looking for good fuel economy.
In a perfect world, I would have opted for a Suzuki Lean-Burn 140hp 4-Stroke because of how fuel efficient they are, but that is a LOT of coin to drop on a new motor and you rarely find them for sale used. I’m a Craigslist Whore and browse the sale threads on a weekly basis looking for good deals. I found a old boat that some guy had for sale that had a newer Honda 90hp 4-stroke on it that was being sold fairly cheap. The boat was pretty much a lost cause with soft spots all over the fiberglass deck, but the motor was running the last time he had used it. He told me it had been sitting under a tree in his yard for the last 3 years.
I offered him $2000 low-ball for the whole deal and he took it. A month later, after the Cedar Key Marina had replaced the fuel pumps, every single rubber line/gasket on the motor (they had all dry rotted due to the Florida summer heat), put on a brand new lower end in and replaced too many other things to mention, the motor was running like a champ. All in all, the replacement parts and service costs came to another couple of thousand dollars, so I basically have a new Honda 90hp 4-stroke that I’ve spent just under $5000 for.
Some might wonder if that makes any sense, as I know Cindy questioned me on a daily basis when I kept getting calls from the local marina technician telling me that they found something else that needed to be replaced as they dug deeper into the repairs. I now know why boat owners always say “Either use your boat or sell it!” Outboard motors DO NOT like to just sit around for years in the Florida heat.
So I’ll explain to you the same way I explained to Cindy, and I didn’t even know this for certain, I was just going on a hunch at first. FUEL ECONOMY!
We used to have an 11 gallon gas tank. We’ve ran out of fuel numerous times while spending the day on the boat. The old 2-stroke motor loved to drink fuel and did it like a champ. We normally carried two back-up 5 gallon fuel cans with us to try and not run out, but even with the 21 gallons total, there were still times we’d run out and have to call a friend to tow us home.
Just after we had the Honda installed, and while we were under our break-in period, the stage where the mechanics told me not to run the motor over a certain RPM for the first 50 hours to break everything in, we took the boat down to Crystal River for a weekend of fun on King’s Bay. We motored around the entire day, from sun up till after sunset. We idled most of the day just letting the motor putt-putt us around the bay enjoying the views and the warm Florida sunshine. The next morning we planned to do the same thing and pulled up to Pete’s Marina to top off the gas tank with marine fuel. I told the attendent to top the tank off and went inside to get some ice for the cooler.
I came out and he said “Hey Mr, it only took 3 gallons!” Cindy and I both looked at one another in disbelief. We were carrying the back-up 5 gallon fuel cans like we normally do, but had never had to use them the day before. So we idled around for an entire day and only burned 3 gallons of fuel!?!?! With the old 2-stroke motor, we’d probably have burned through all of our fuel if we would have even been able to idle around for the whole day without the motor overheating.
 When you consider how much we use our boat, the $5000 we invested into this motor will probably pay for itself in the fuel we’ll save in the first year alone.
The old Mercury 2-stroke would have stalled numerous times doing this, and we’d normally be leaving a cloud of blue smoke behind us as we idled loudly past everyone else anchored at the sandbar.
The Dynamics Changed Drastically with the new Motor!
The main issue with a 4-stroke motor is it’s weight. They’re usually heavier than the comparable horsepower 2-strokes. When we hung this Honda off the back of the boat, the boat rode, moved and handled like a completely different beast. The 4-stroke is much slower than the peppy 2-stroke, and getting up on plane seemed harder. Especially with the heavier motor on the boat, the boat wanted to climb out of the wake and you had to give it almost full throttle to get it to climb up and get on plane.
This brings us to our next addition…….Flotation Pods.
With the boat sitting lower in the water, I didn’t like the way it was performing with the new motor. I loved the fuel economy, but I noticed we were hitting the bottom more often when pulling up to the beaches, and one of the things we loved about this boat the most is the fact that it floats in a few inches of water.
Back to Williston Marine Metals it went. I had originally asked if Troy could just make me a set, and he said it would probably cost less if I bought a pre-made set, and he just paired them up to the back of the boat. Later on, he said with as much work as he had to do to have them look and perform properly, it would have been easier for him to just make them from scratch.

Looking at the back of the boat with the Flotation Pods and the new motor
With the flotation pods added, the boat was back to running the way it did before we had the 4-stroke put on. The boat is floating in shin deep water in that photo! Problem solved and it also gave us an added feature, or two.
 Troy custom bent aluminum stock so each pod acts as a standing platform with a handle/grab rail for getting into the boat. I added the grip tape you see in that photo. He welded a retractable step ladder onto one of them to get in our out if anchored in deeper water. He also added 4 more LED Underwater Lights to the sides and back of the flotation pods. I had found these L.E.D. Underwater Light‘s that claimed to be 600 lumen’s. They are not that bright, but they are still cool and cost under $20 a piece.
You can see the lights mounted around the motor in this image
Power for for our devices
I know, the reason we go out on the boat is to escape all the technology and bullshit. But we also own a business that demands us to be on call pretty much 24/7. We’re normally streaming Pandora on the radio which usually sucks juice pretty quick. The radio head unit has a USB that can plug the phone charger in, but I went ahead and added a Dual USB Charger and had it hard wired to the batteries. Now everything stays charged while out cruising around on the water. That charger is a Marine unit, so it has a good rubber seal to keep it dry when closed and not in use.
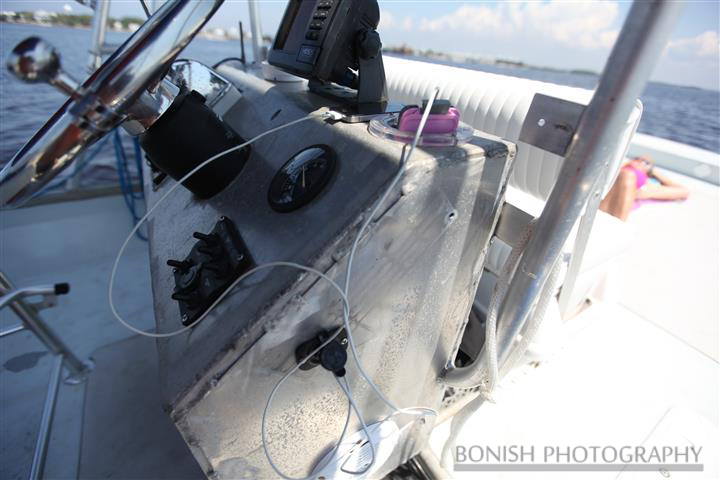
You can see both phones plugged in and sitting on the center console in this image
Stand Up Paddle Board Holder
We were headed down to Crystal River to go Paddle Boarding and I quickly made up a PVC Paddle Board Holder to keep the SUP on the boat, but out of the way and keep the deck clear.
After a weekend of use, we saw that this worked really well, but the PVC was somewhat redneck to say the least. While I was at Williston Marine Metals (You can probably tell I spend a bit of time there) I showed the PVC holder to Troy, and asked him to come up with a better solution. I told him I’d let him use his imagination just as long as it worked.
Never one to fail when handed a task like this, Troy’s creation is pretty awesome.
This was my original PVC Holder
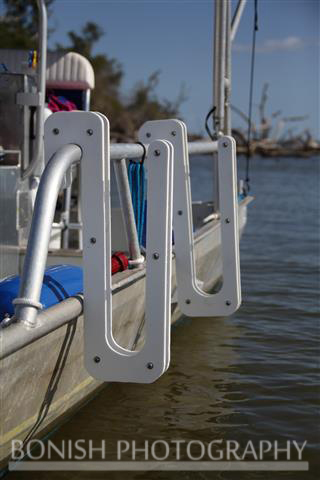
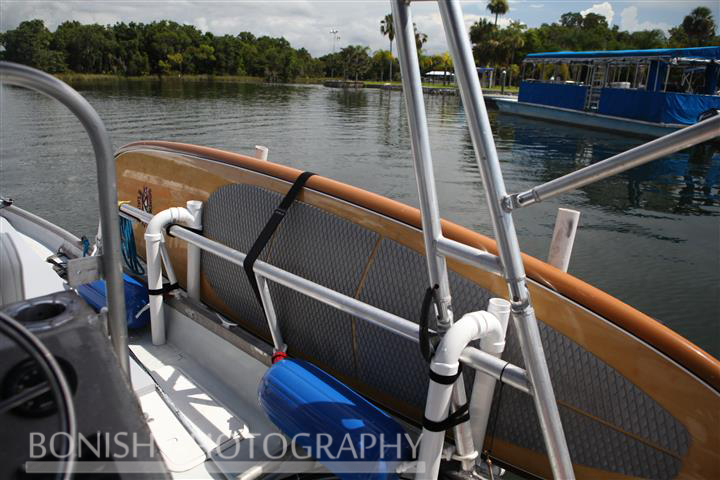
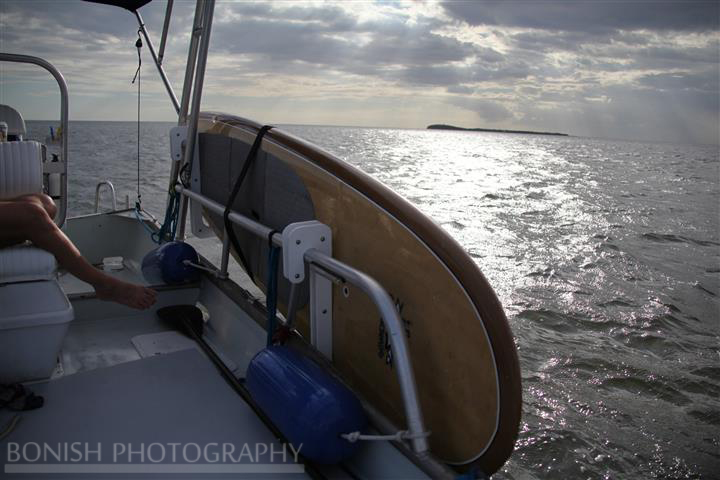
Troy’s Creation is two pieces of Marine Board sandwiched with stainless steel spacers. It hangs over the side of the railing
After a few weeks of use, we figured out that there is room for improvement. The boards dont need to hang over the edge so far, which tends to catch a splashing wave and direct it into the boat.
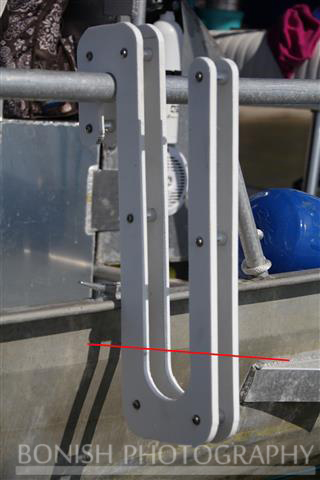
The Red line is where the bottom of the hanger could still be and would probably be far enough the water line to not splash
Right now, I solved the problem by moving the board further back on the boat, and hooking it higher on the bimini support
Over the past few years, we’ve logged some serious miles on this beast. I’ve had the Chart Plotter for a few years and this week we passed the 1800 miles on the boat. Not hours of the motor running, but miles ran floating the boat around.
Last summer we made a trip up to Kentucky for somewhat of a Family Reunion. The trailer that had been patched together was not going to make it that far. So I went back to B&S Trailer and had Cliff make me a custom aluminum trailer fit perfectly to my hull. Single Axle, Bunk Slides, Ladder, 2 full-size spares, Winch that could literally pull the boat up onto the trailer off the ground if it needed to and LED lighting all the way around. It’s a beauty and when ever we pull into a gas station, people come over and ask about the trailer and the boat.
The new trailer pulls like a dream and made the trip up to Kentucky and back worry free. Since then, we’ve towed it to Crystal River, the Rainbow River, the Suwannee River and many miles around local boat ramps to visit new places to photograph. I cant think of anything Cliff forgot and Heath likes to joke that the ladder on the trailer is nicer than the boat itself.
The Ladder to load things and make getting onto the boat while it’s on the trailer much easier
Dual Spares and they’re kept somewhat shaded while the boat is loaded
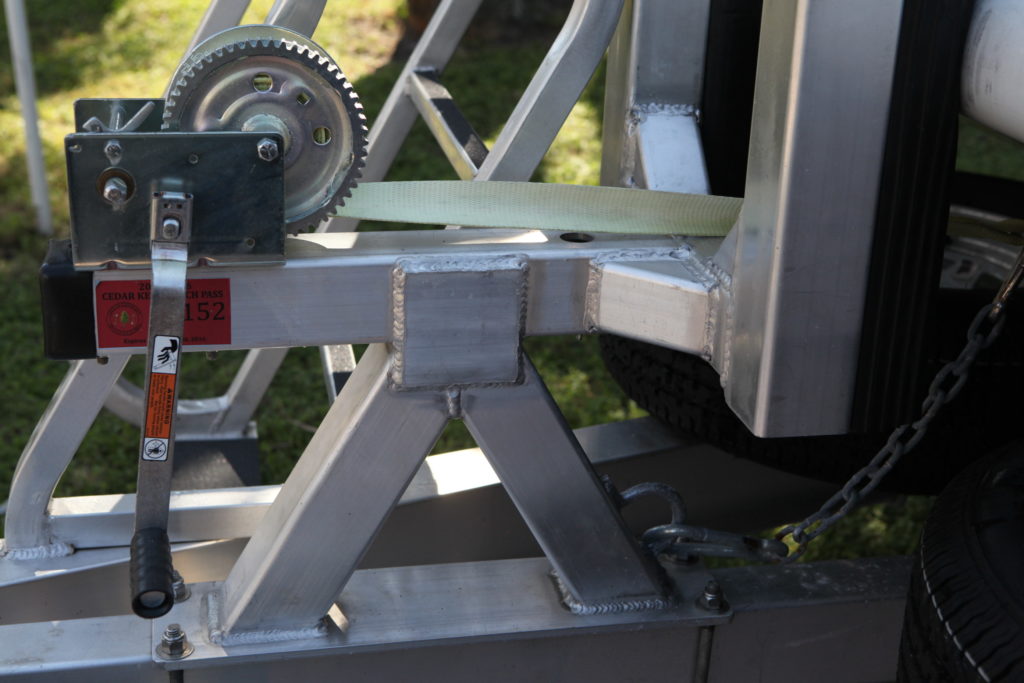
Check out how Beefy Cliff builds his boat trailers
Random Photos to just show how much we love this boat!

Floating down the narrow Wacassassa River
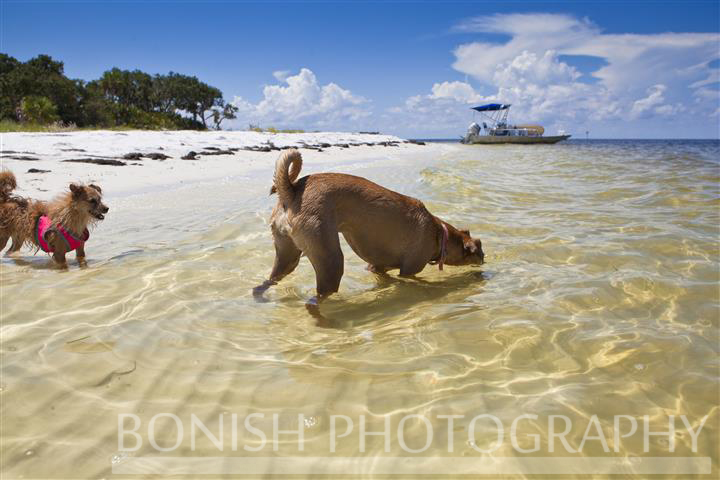
Hanging out on the secluded islands in Cedar Key

Cindy walking along a sand bar while the boat is in about 5′ of water
The smile on Honey’s face says it all
So that’s our boat for now. There are always things to be added and the list of ‘Wants’ is never ending. But those are just wants, right now, I’m happy with my 2 point navigation system laying on the deck and the fact that I’m lucky enough to be out on this boat on a weekly basis.
